
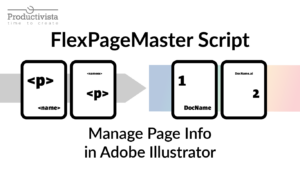
Do you want to learn how to add page numbers, date and name of your document in Adobe Illustrator? Here I introduce you to a script that can do it. Scripting for Adobe Illustrator can open new possibilities and speed up your workflows. In this post, I’ll show which part of the PagesDateName script you can customize to influence the appearance of your filename.
Adobe Illustrator is not InDesign, but as you can work with multipage documents in Illustrator, you sometimes need to set page numbers as well as the name of your file and maybe a date of creation.
Update! PageIndexer script
If you enjoy the benefits of page numbering and annotation in Adobe Illustrator with my previous scripts, I have exciting news! I’ve recently developed a new script that takes your design workflow to even greater heights—introducing PageIndexer, the ultimate solution for page numbering and annotation in Adobe Illustrator. If you’re interested in exploring this script and discovering how it can enhance your design projects, I invite you to check out my latest blog post. Click here to learn more about PageIndexer and unlock a new level of creativity in Adobe Illustrator.
This example script places this information on your pages. I find this way more convenient than adding it manually, as well as it prevents typos and errors. I adjusted the script and made an action that runs the script. That way, I can insert all the information on my document with just one click. I covered in a previous blogpost how you can record an action.
I decided to split this topic into three parts. Else it will be a very long reading filled with “heavy” information. This is the second part. You can download the scripts here, but I suggest that you read the first part of this topic as it contains information about how you can deal with script files and some other theoretical approaches that could be necessary for an understanding of this subject. You can find the third part here.
In this blog post:
- How to edit and customize the appearance of your filename text
- Position of your filename text in the artboard
- Justification of your filename text
Script part 2: filename
Filename and placement
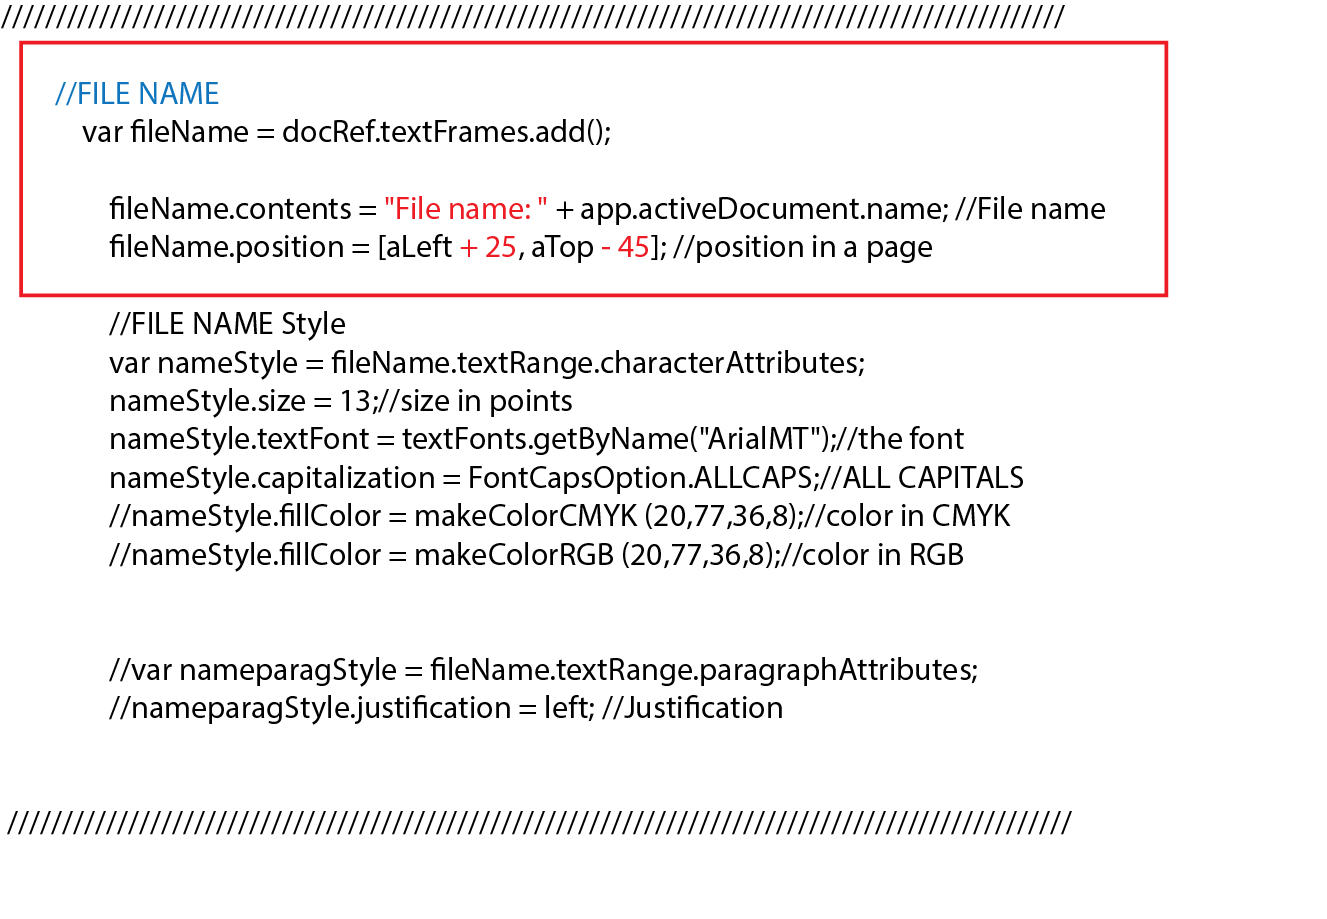
In the Illustration some text is marked with red. The red text shows where you can make your adjustments.
Here are three places you can adjust.
1. fileName.content. There is a text in quotes (red). You can change the text inside or delete it. It will appear in front of the documents name.
2. fileName.position. This is where you define the position of your text on the artboard. In this example it will be places 25pt from the left margin and 45pt down from the top.
Example
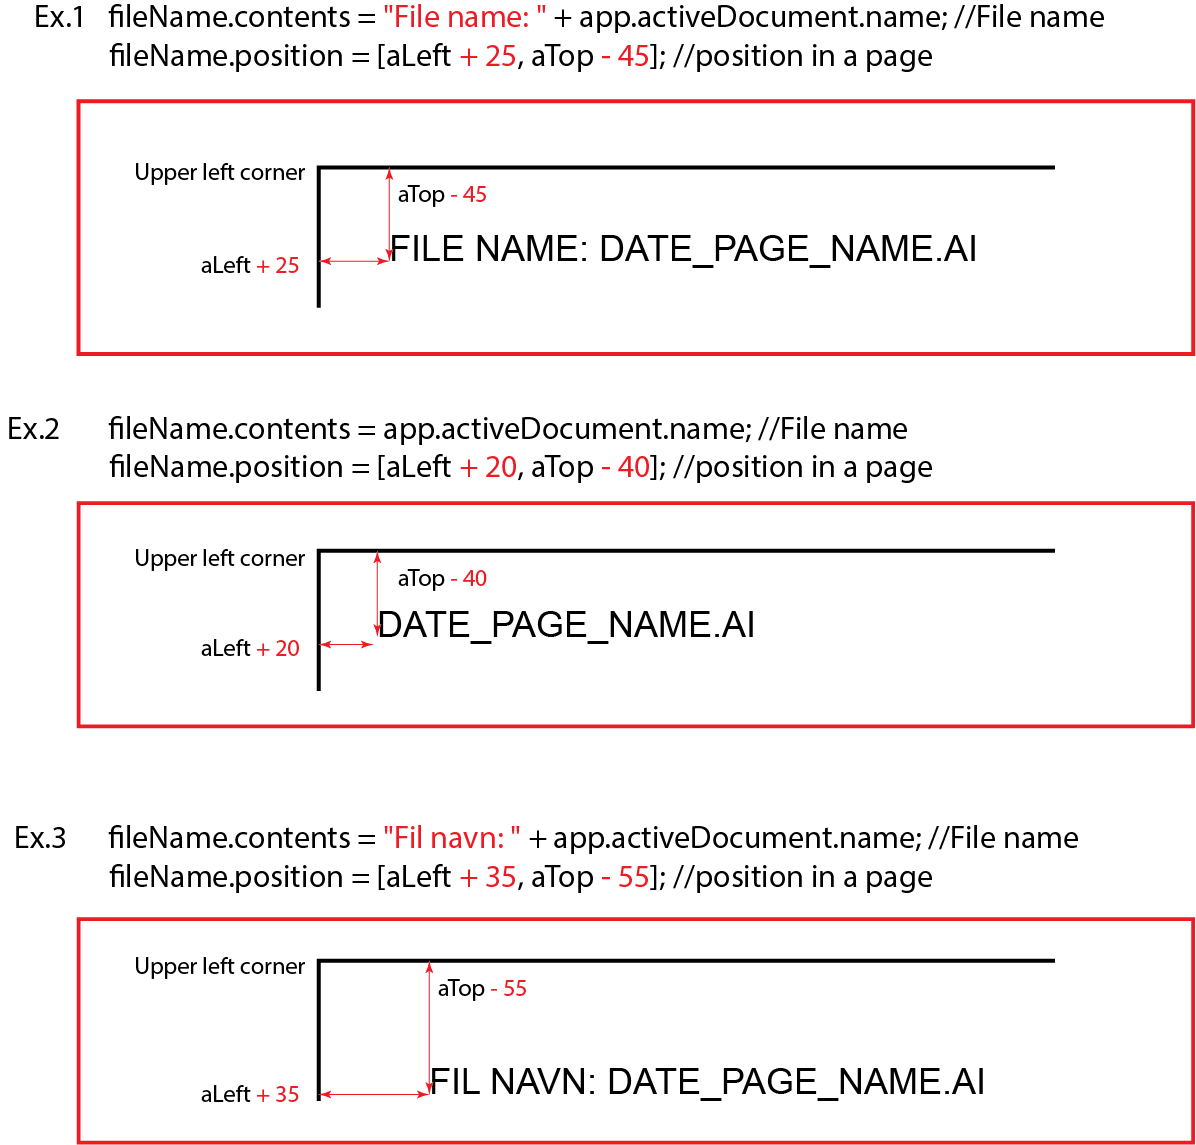
Maybe it’s easier to understand with some visual examples (Figure 5):
Filename style
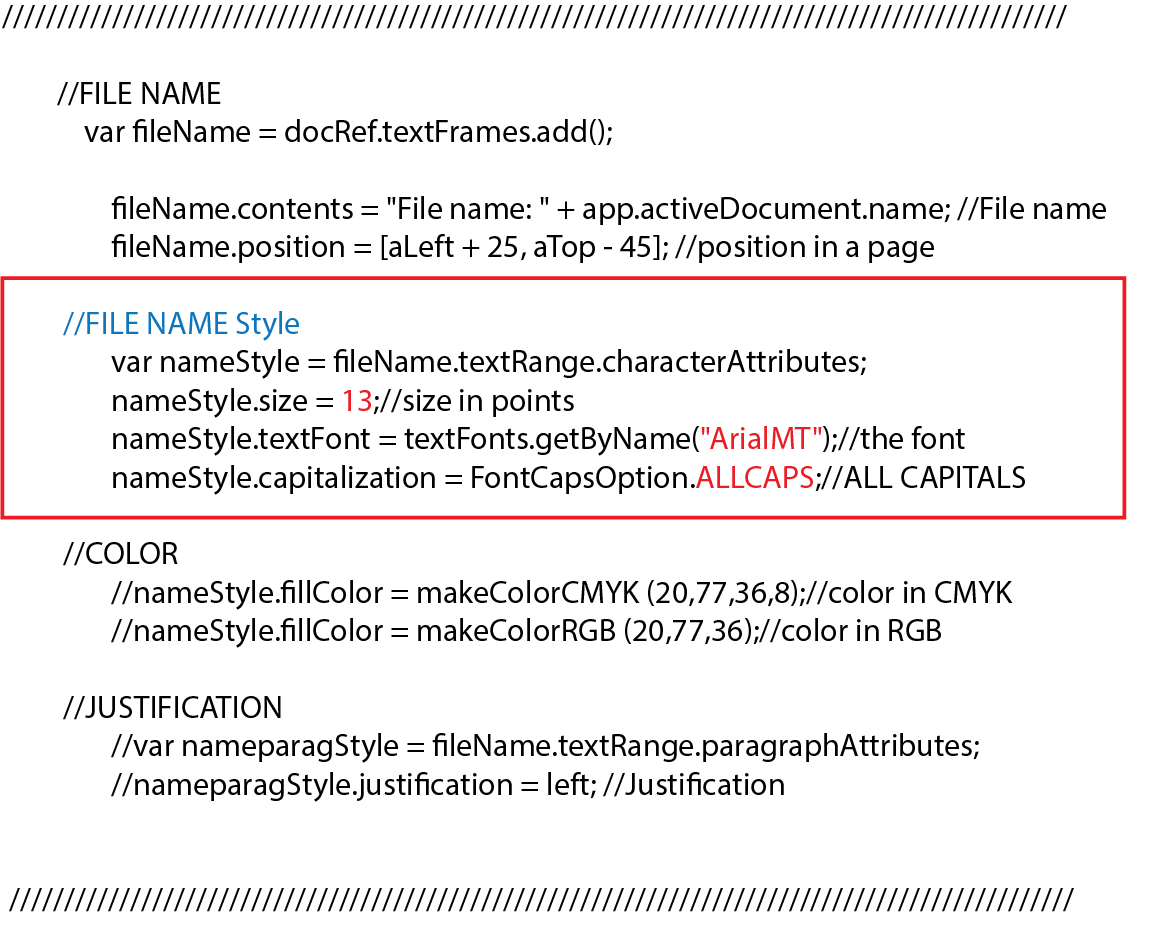
In Figure 6 you can see where to adjust your font size, font, and capitalization.
Example
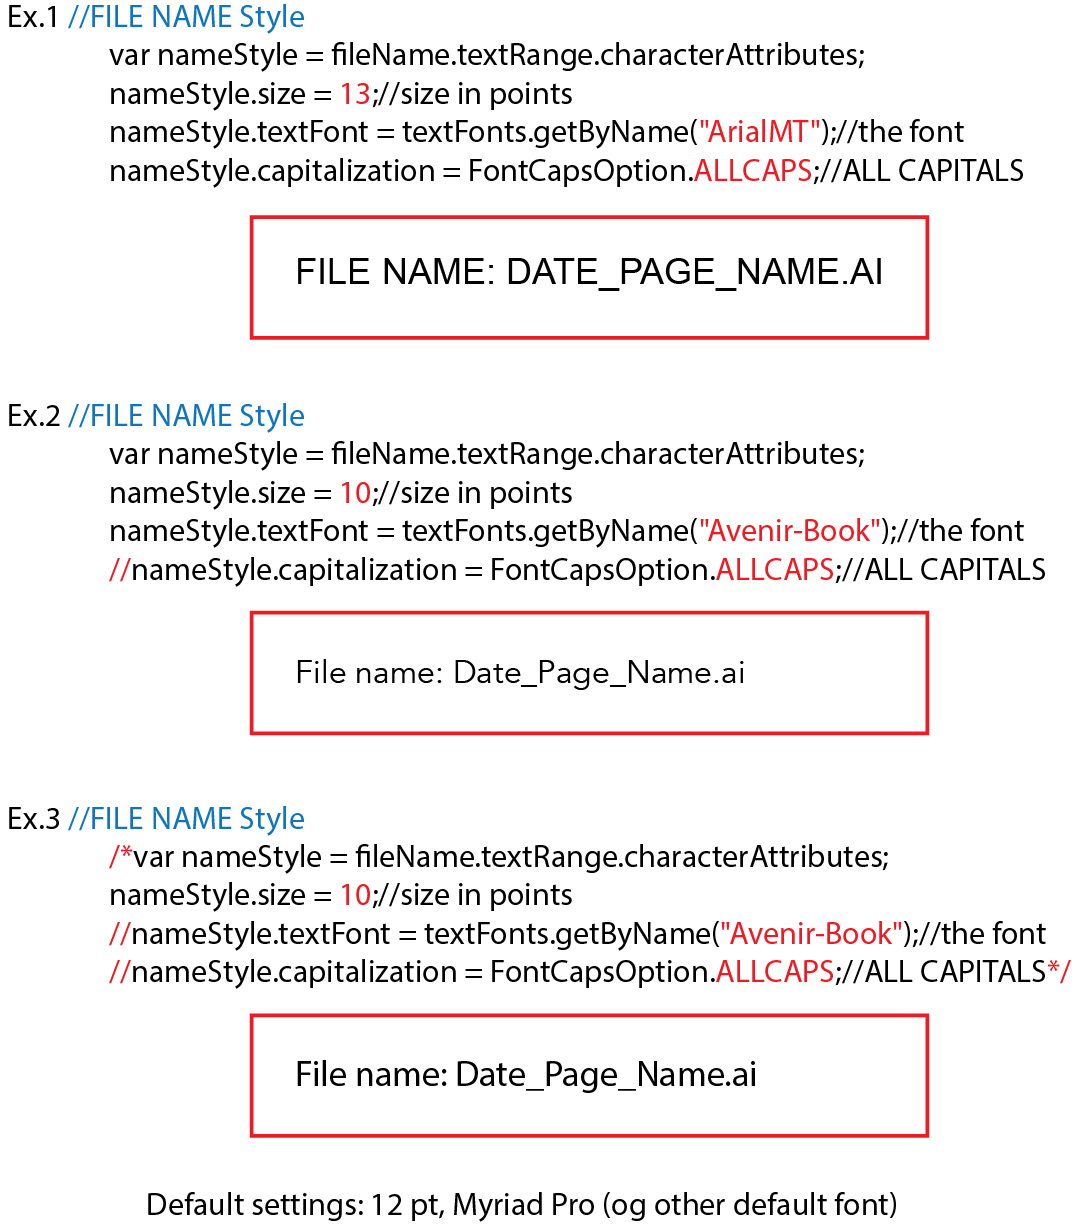
Below (Figure 7) you can see three examples. In the first example, the font size is 13 pt, the font is Arial and capitalization is used.
In the second example, the size is 10 pt, font Avenir-Book and Capitalisation is off (“//“ out comments the line and the text will not be converted.)
The last example shows all lines, that define character Attributes are off (“//“ out comments the line and the text will not be converted). In that case, you’ll get default settings: 12 pt text in default font (as a rule Myriad Pro; but you can read my blog post about how you can change default font).
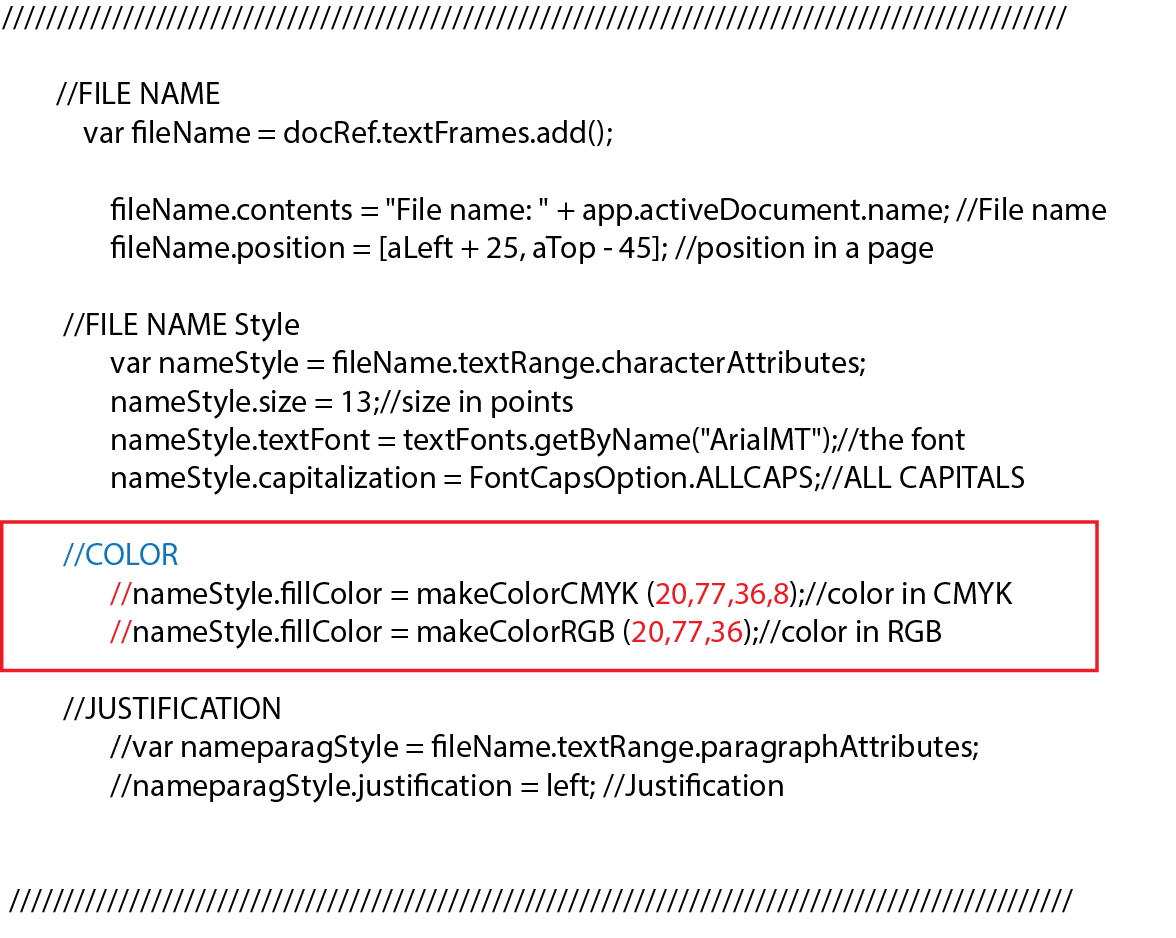
Filename Color
There are three options to customize the color of your text (Figure 8). You can activate CMYK, or RGB, or you can deactivate both of them. In this case the color will be Black.
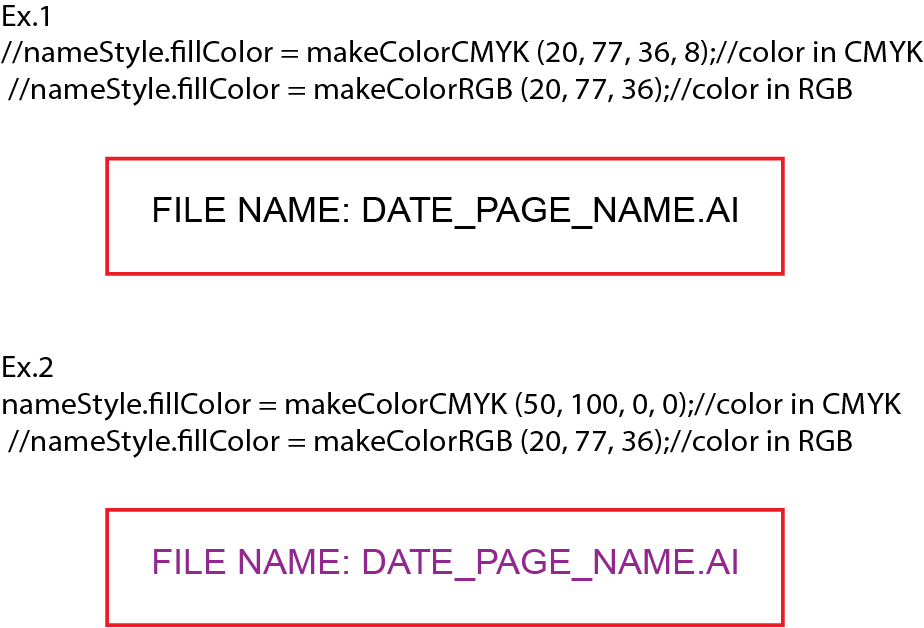
Example
Again some examples with setting different colors (Figure 9).
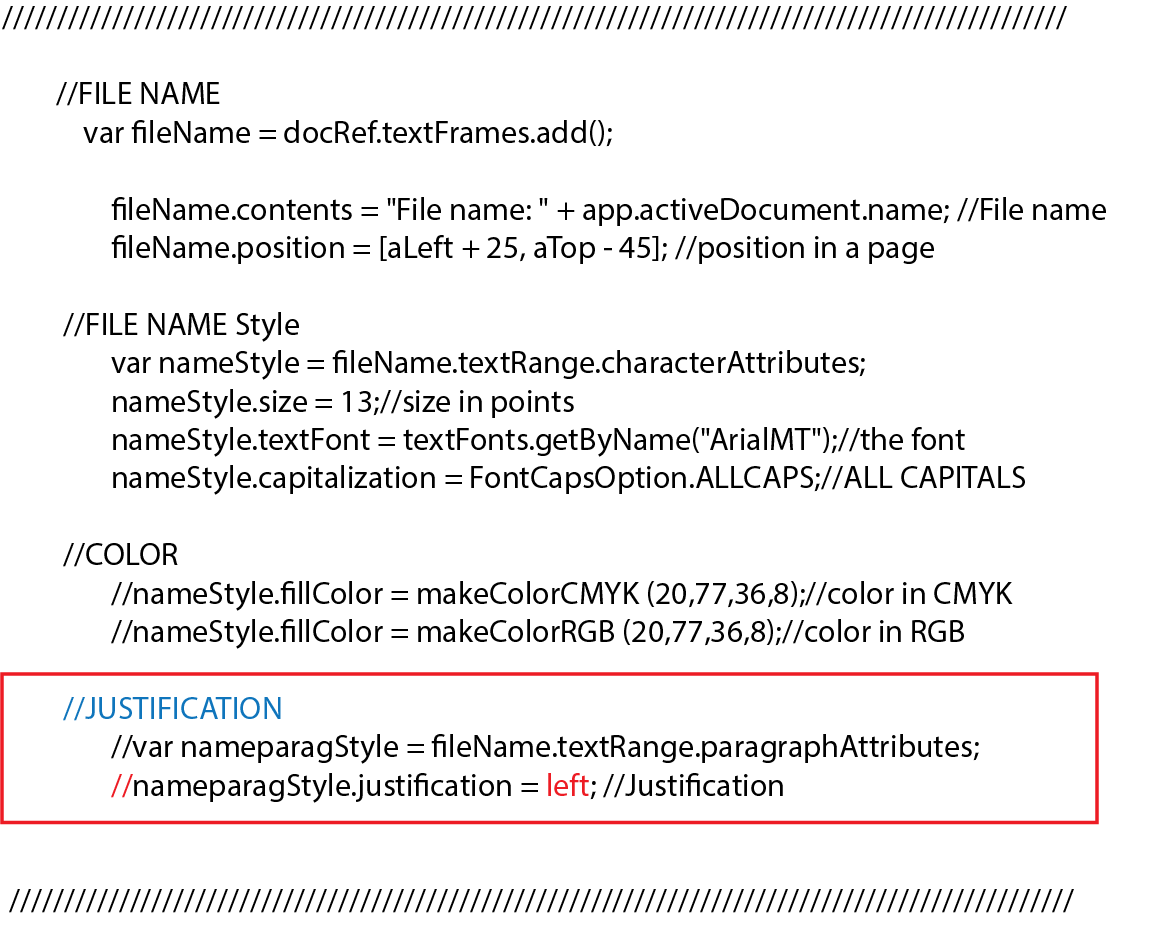
Filename Justification
Figure 10 shows where you can justify your text in the script.
Example
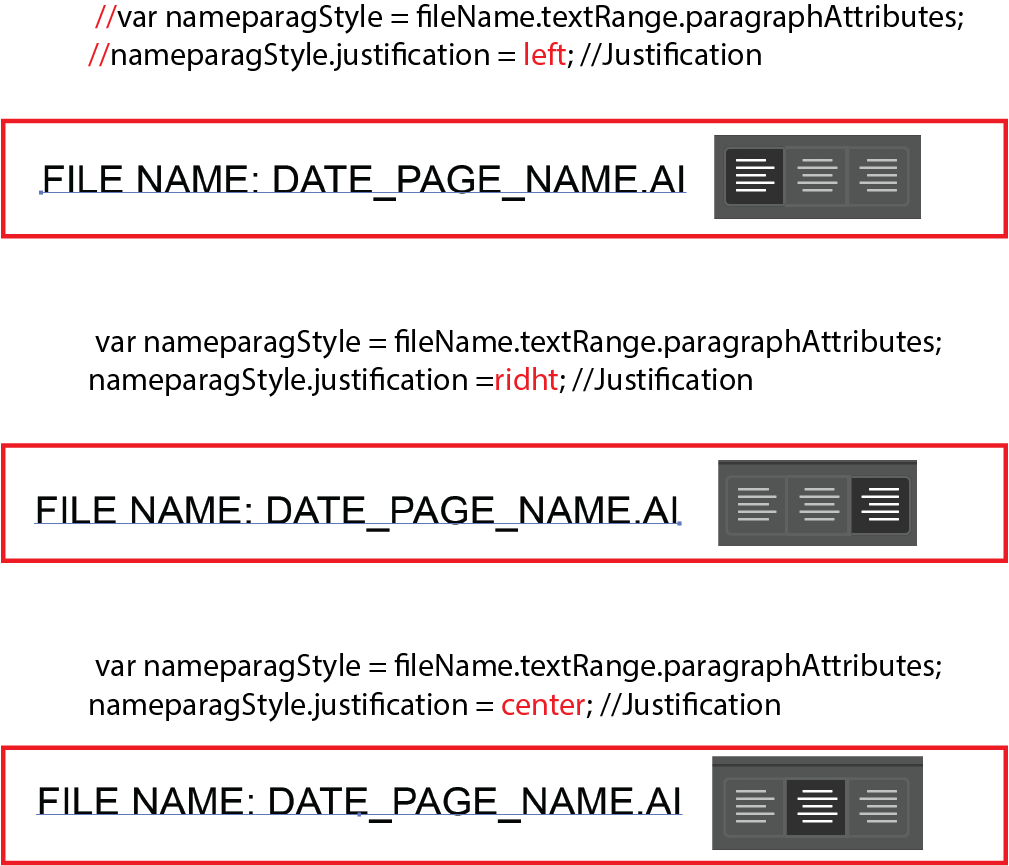
And in the Figure 11 you can see three examples.
I hope you learned a bit how to customize the filename text appearance in your script. If you never have seen any code before it may seem like it’s a difficult subject. But try to execute some of the changes you make and you will understand better how it works. Scripting is an applied subject, so don’t be afraid to learn by doing. Here, I tried to explain it as simple as possible, but please write a comment if you have any questions or something appears unclear. I’ll be happy to help, and if you have an idea on how I can improve my explanation, please let me know as well.
Next time it’ll be the last post about this script and it’ll be about how to edit the date text and how to add page numbers to your Illustrator document.


3 Responses