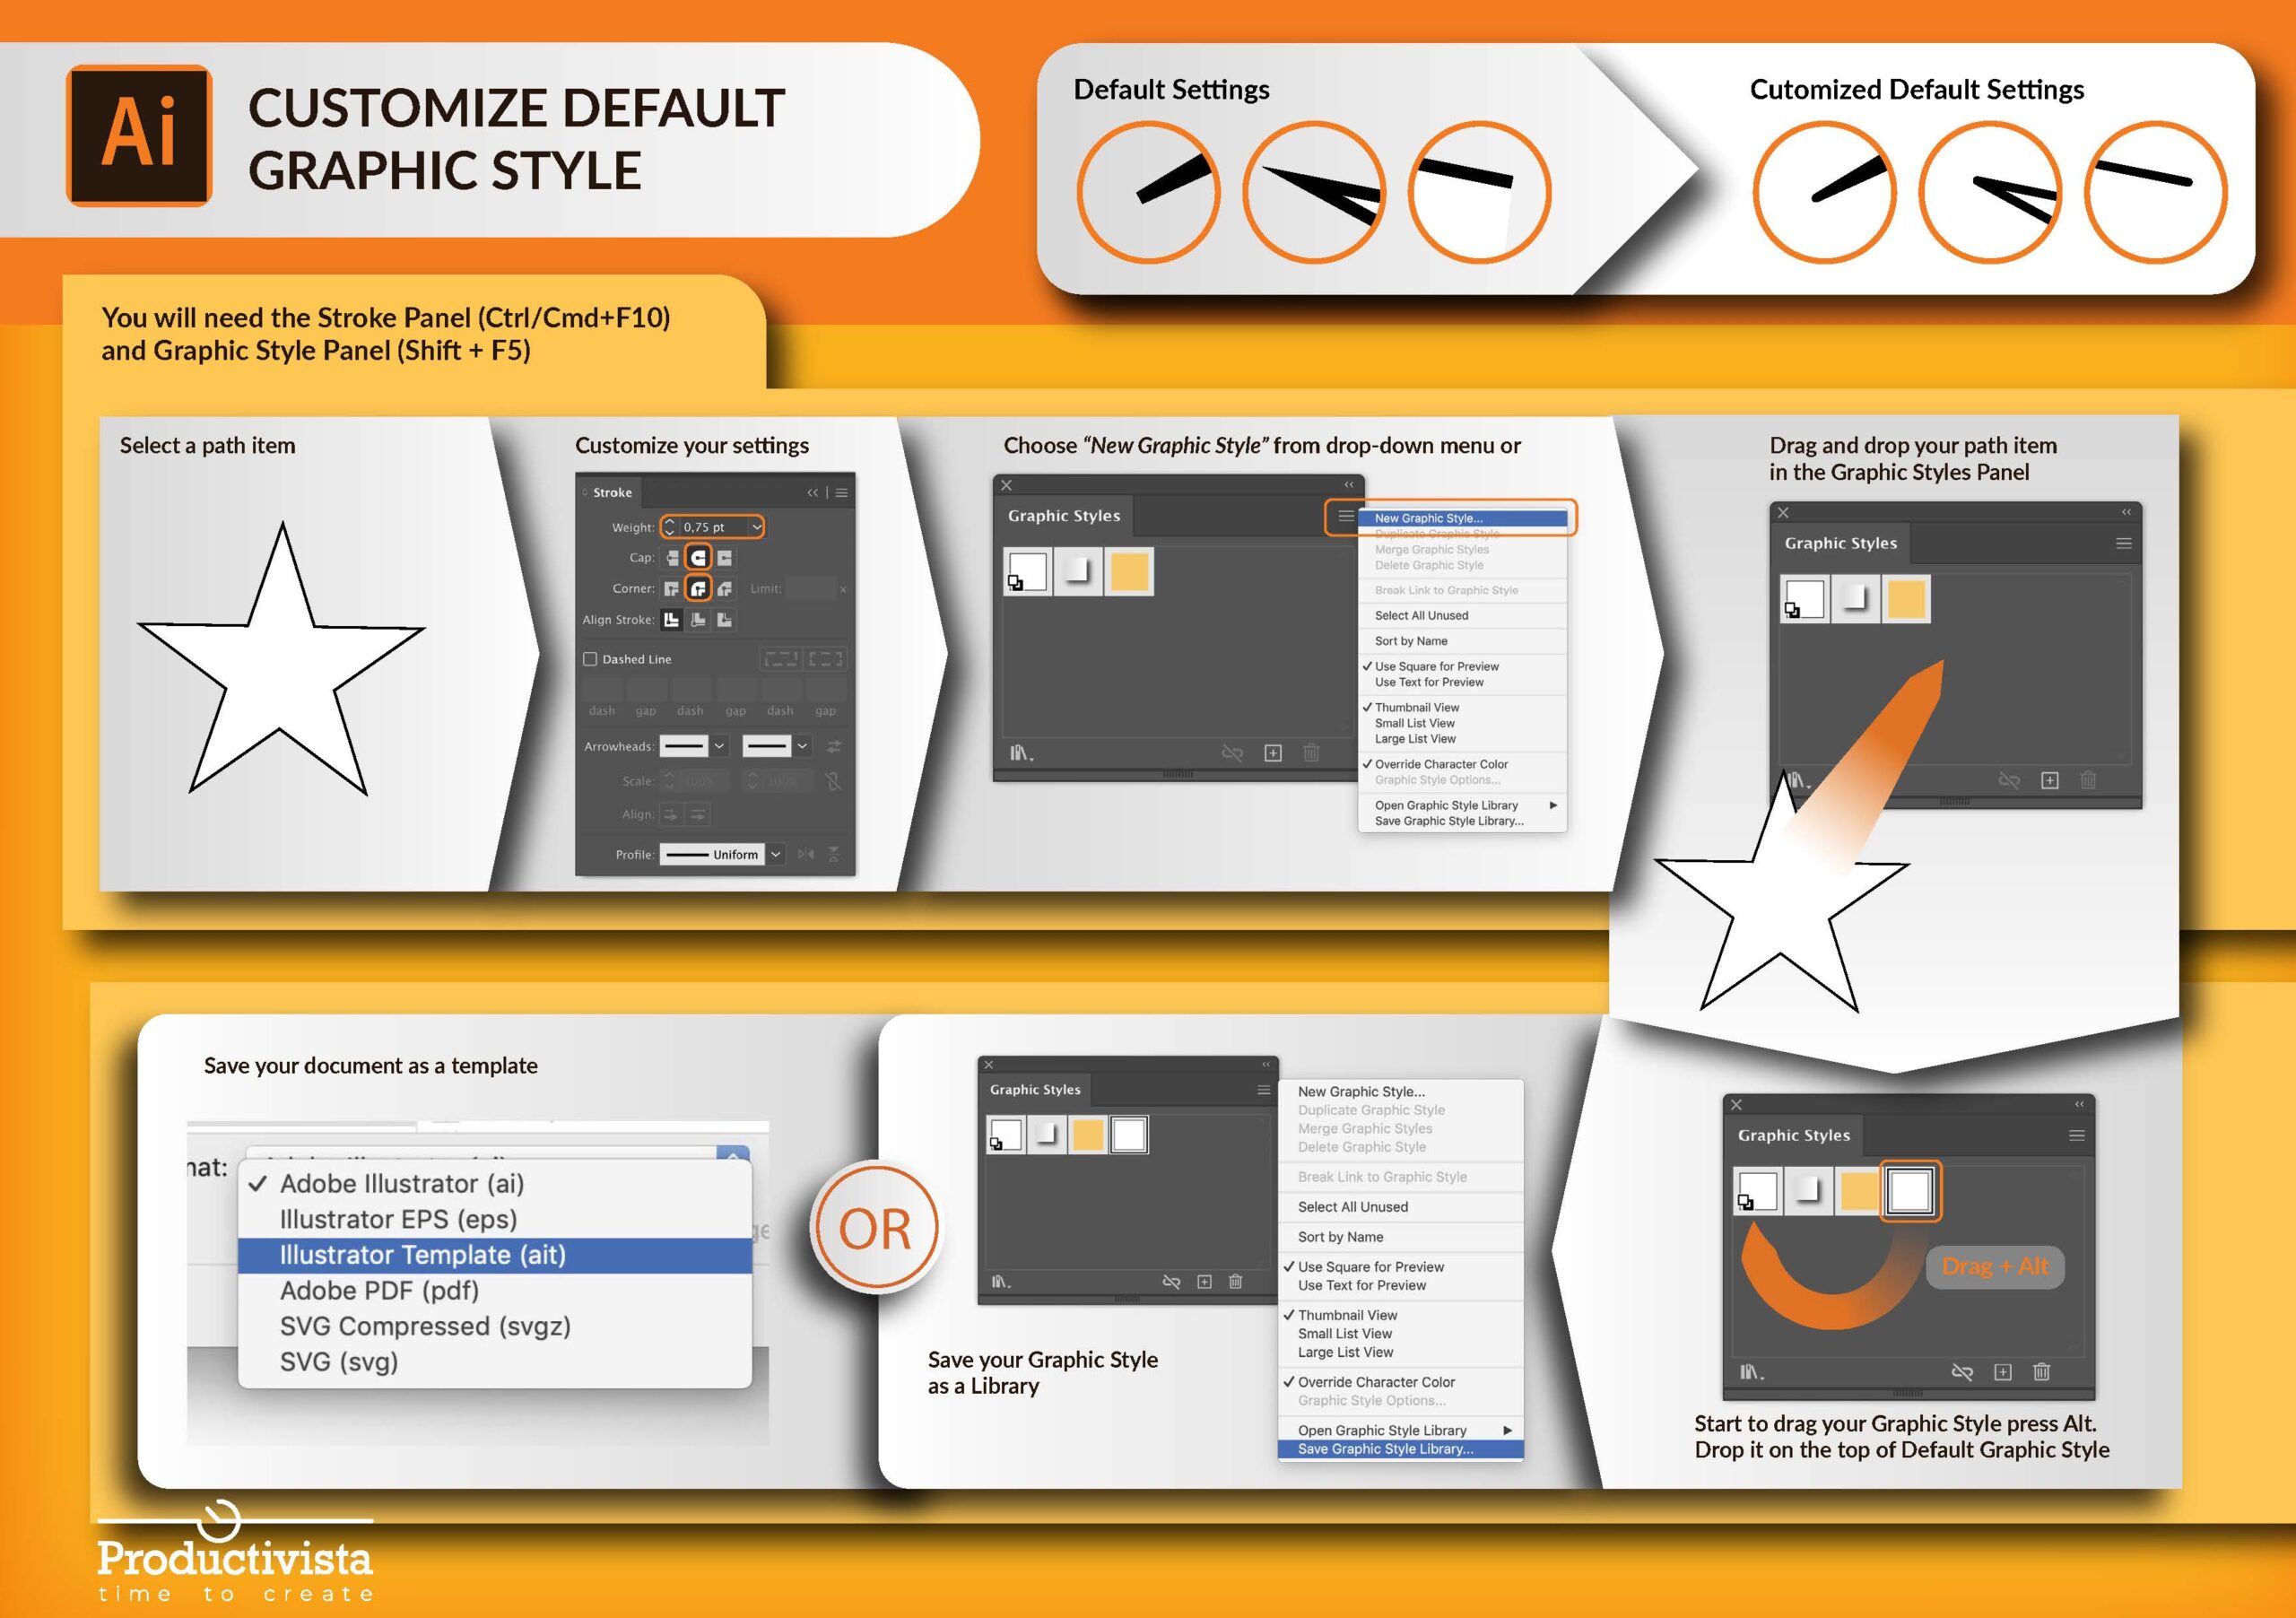
In this blog post I want to show how to create your own customized Default Graphic Style. This way you can assign the custom style to a path just by pressing D-key.
Designers, as well as a lot of other people, prefer visual information. So I have made a one page visual PDF for some of my blog posts. You can download it here, completely for free and anonymous. I hope it’ll be helpful.
Default graphic style and how to use it
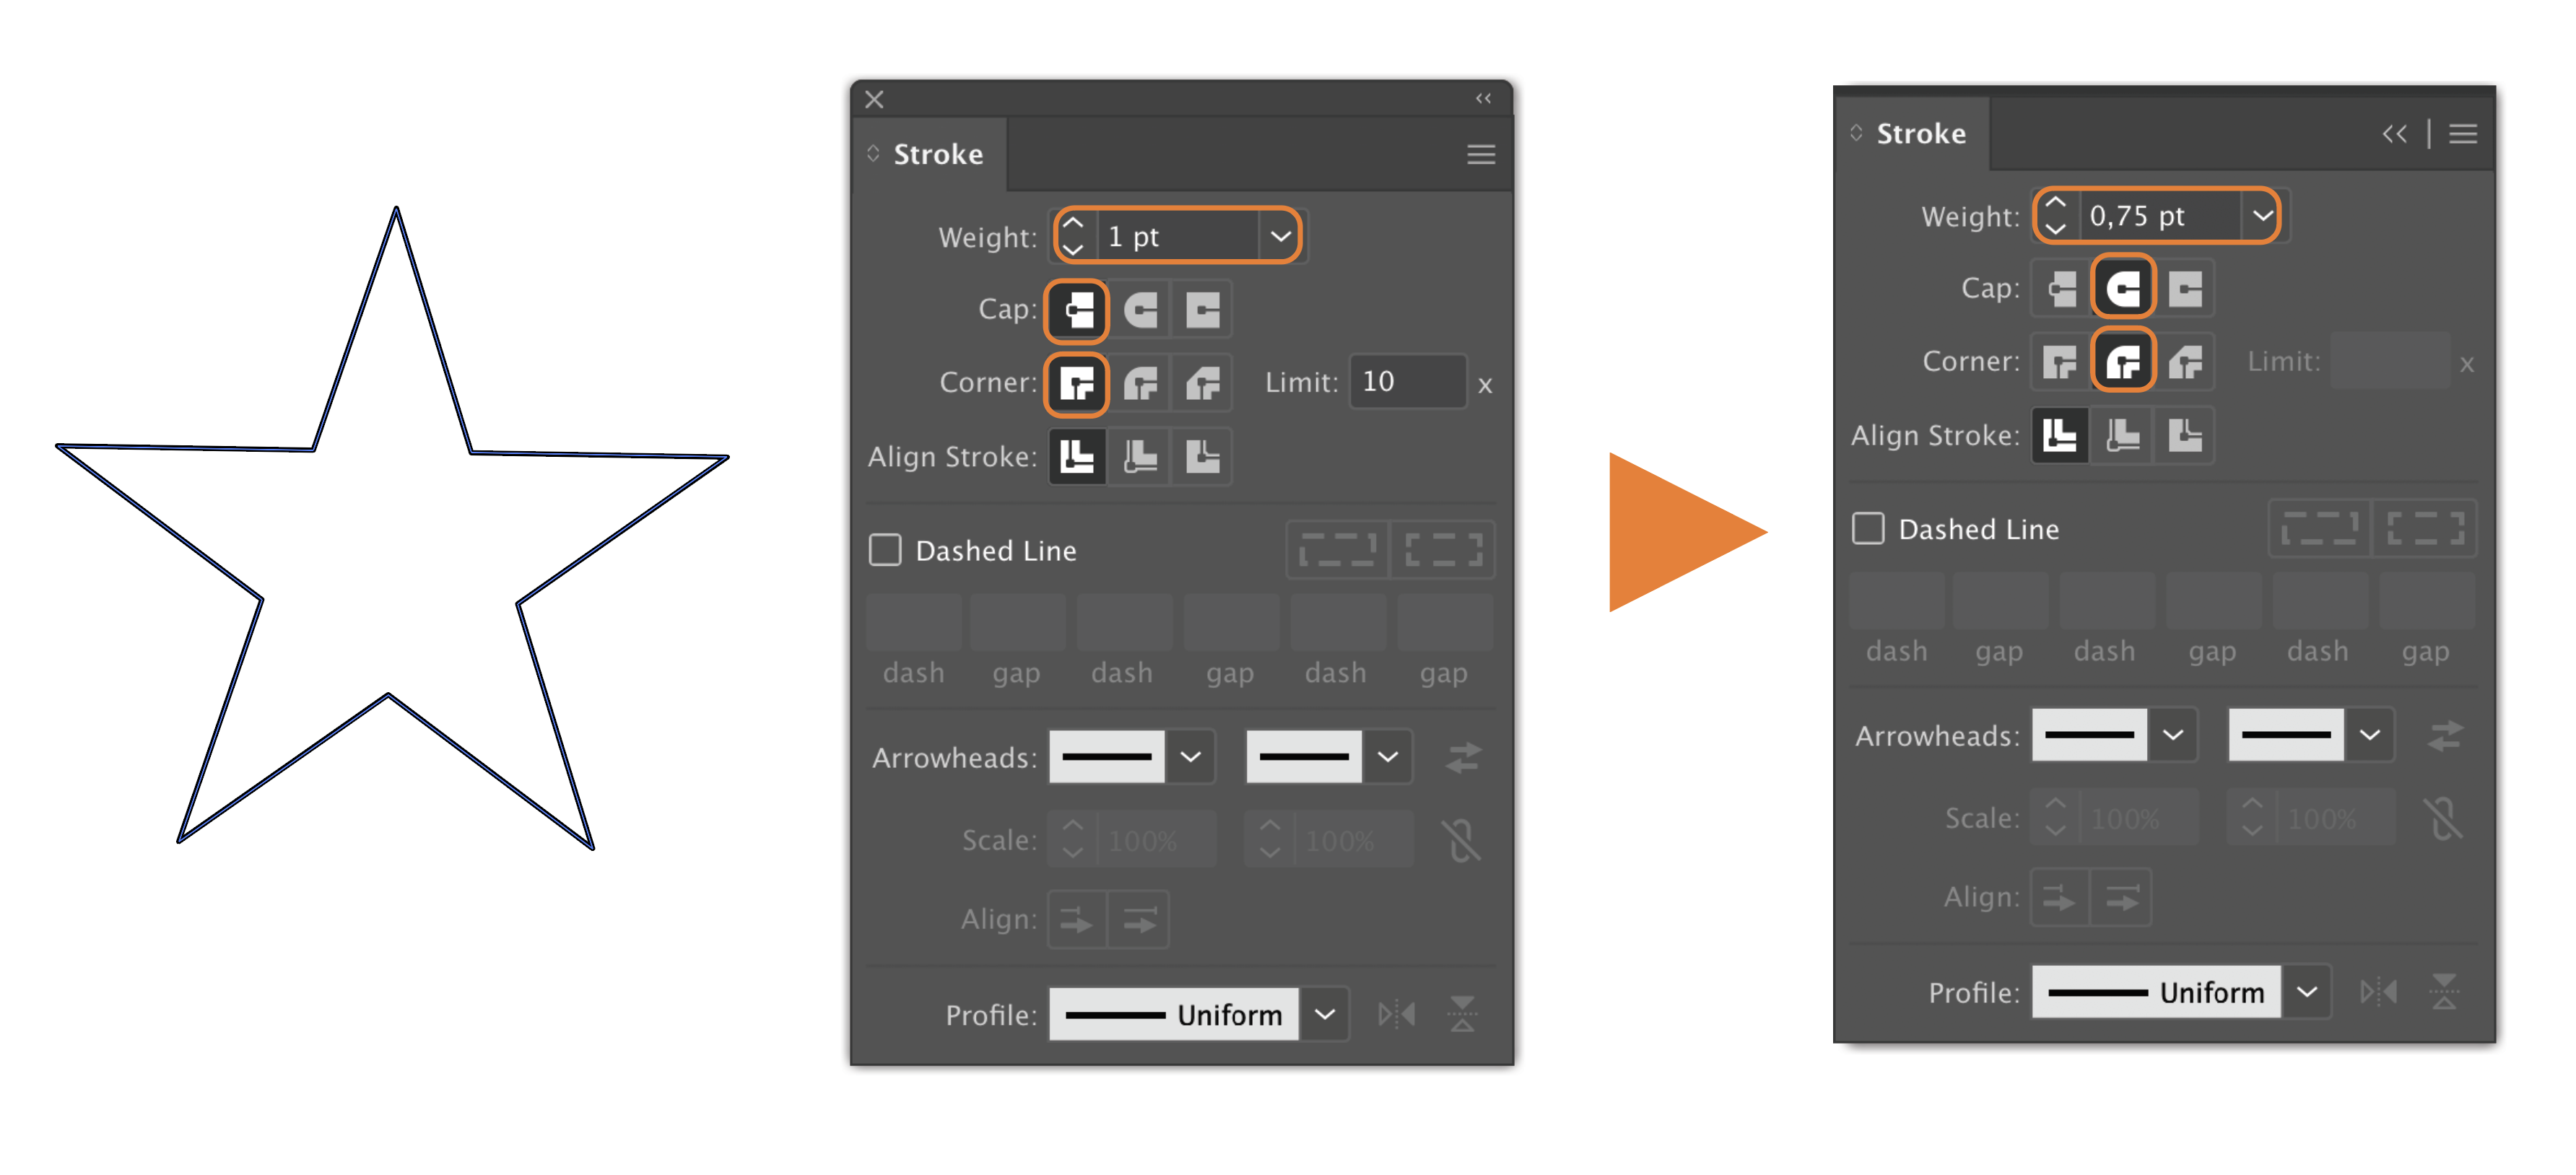
If you select your path item and press the hotkey “D” the fill and stroke of your path will change to default settings: white fill and black 1 pt stroke. I guess it’s “D” for default.
This is smart and it works pretty fine in most cases. But if the path has sharp corners it can end up looking like in the picture below.

Personally I’m not very happy about that particular default. Too often I find myself changing the default settings to something more suitable for my needs and I believe that I’m not alone. The good news is that it’s easy to change the default settings for a path.
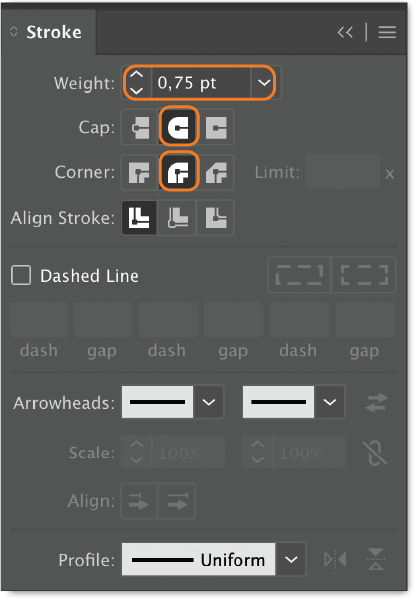
Draw a path and open the Stroke Panel (Ctrl/Cmd + F10). Change the fill and stroke settings to the settings you need. In my case, I change the stroke settings from 1 pt to 0,75 pt, and also switch Cap and Corner to Round.
Create new graphic style
There are two methods how you can create New Graphic Styles. Start with opening the Graphic Style Panel ( Shift + F5 ).
The First Method
With your path selected, choose “New Graphic Style” from the drop-down menu in the upper right corner.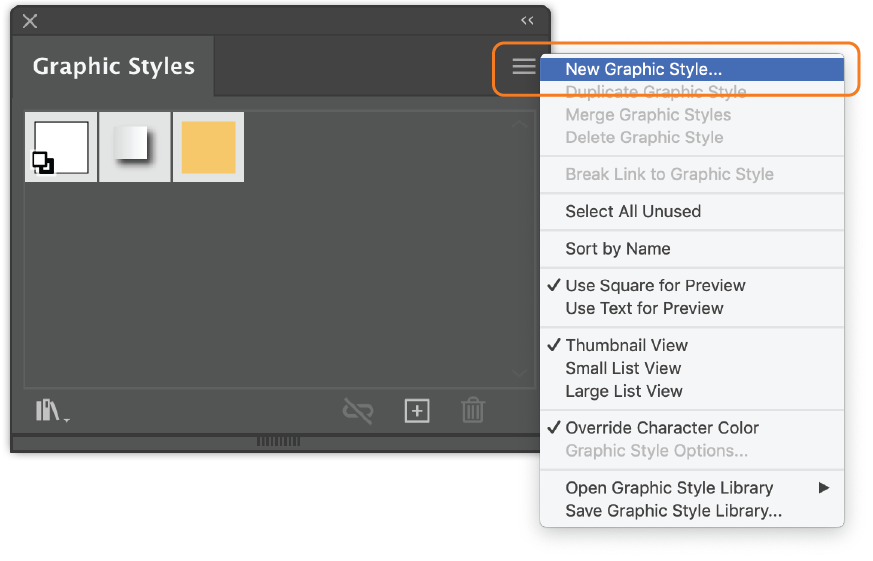
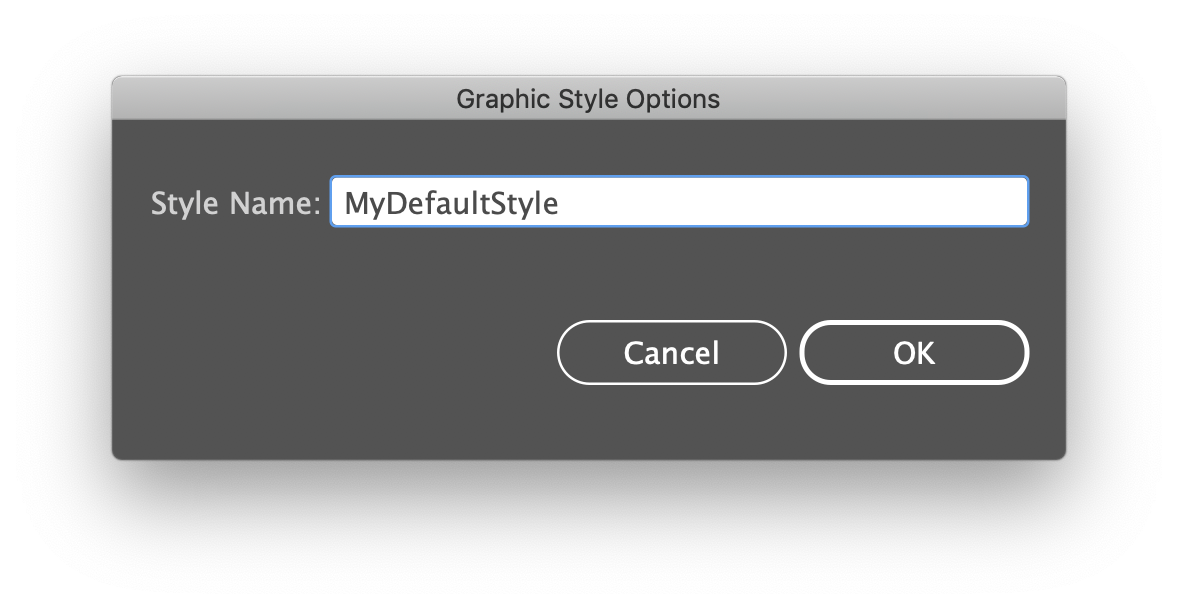
Type the name of your graphic style in the pop-up window and press OK.
The Second Method
Grab your path and drag it into the Graphic Style Panel.
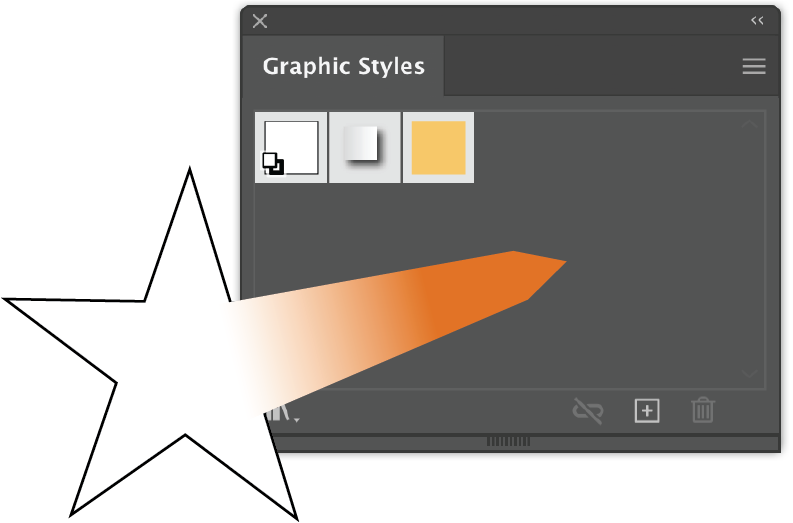
Override the default graphic style
The next step needs some coordination. Grab your newly created Graphic Style, begin to drag it while pressing Alt. Drag it onto the top of the Default Graphic Style until the Default Graphic Style is highlighted. Release your Graphic Style.
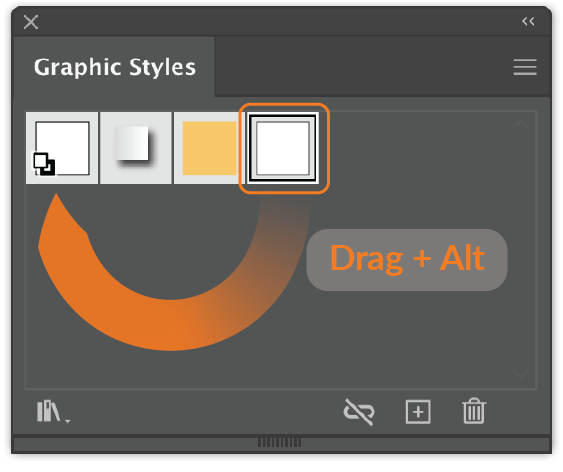
Now the default graphic style is overwritten with your version. When you now select a path and press the D-key, the path changes to your default style.
This is pretty cool … but … It only works for this particular document. After all this effort, this can be a nuisance. But on the other hand, it allows for setting different defaults for different documents and now you know how to customize Default Graphic Style to your own version.
Options for a global default
The good news is, that there is a solutions for setting it as a global default.
1. Save your graphic styles
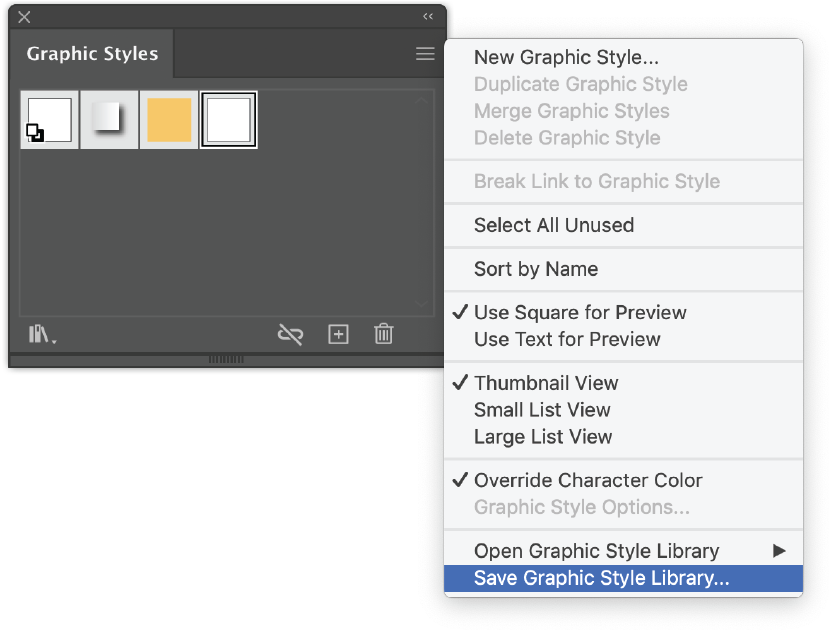
2. Save this document as a template: File -> Save As or press Ctrl/Cmd + Shift + S to bring the Save menu up.
Name the file -> Choose directory -> Choose file format “Illustrator Template (ait)”
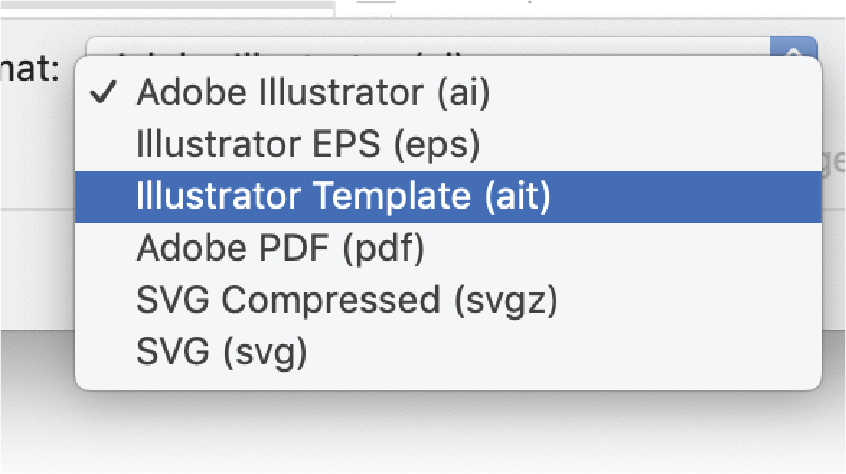
Now, instead of creating a new document, you can always open your template with your own customized settings.
Templates are very useful and I’m planning to write a separate post about it.
3. Overwrite New Document Profiles or create your own Document Profiles
This is also a very interesting subject, that I’ll promise to write about soon.





5 Responses
Is there any way to assign a custom short-cut key for a graphic style? If so, how do you do it?
Yes, you can.
You can read about how to record an action here https://productivista.com/function-keys-and-action-buttons-quick-access-to-your-scripts/, but instead of a script, record an operation where you choose a path and assign your graphic style to it. Then stop recording. The only thing that is required for further use is that you have exactly this graphic style in your document.