- Choose your object (in my case is a star)
- Place it in the top left corner
- Press “Enter” in order to open the Move dialog box
- Type your dimensions (in my case is 20 mm) in Horizontal Position
- Press Copy

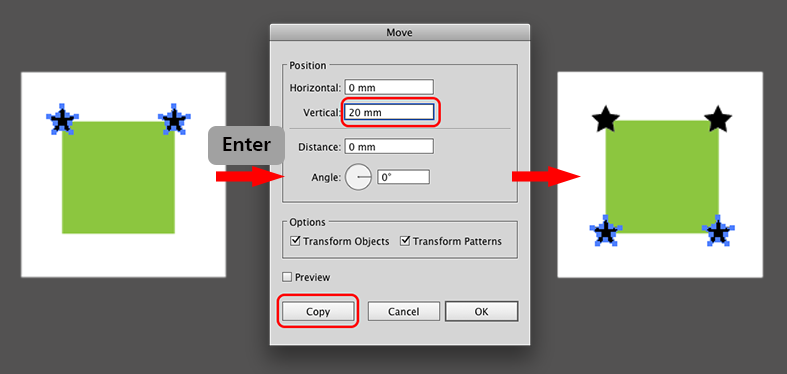
- Choose both your object (in my case stars) in the top corners
- Press “Enter” in order to open Move dialog box
- Type your dimensions in Vertical Position
- Press Copy


Important: To define a pattern your rectangle must comply with the following:
- It must have none stroke and none fill
- It must be placed behind all your objects for the pattern

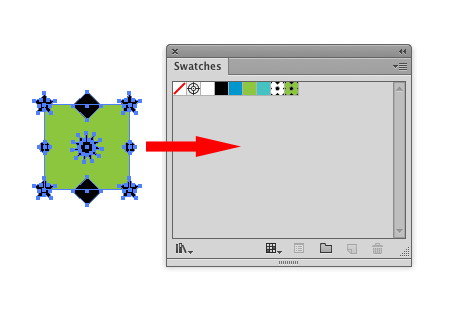
- Select your tile
- Drag and drop it in the Swatches Palette

At this way you create a seamless pattern. and you can assign it to your objects as fill or stroke.

It is possible to rotate or/and scale patterns in your object. Just remember to set a check mark on preview, so the changes will be visible on the fly.
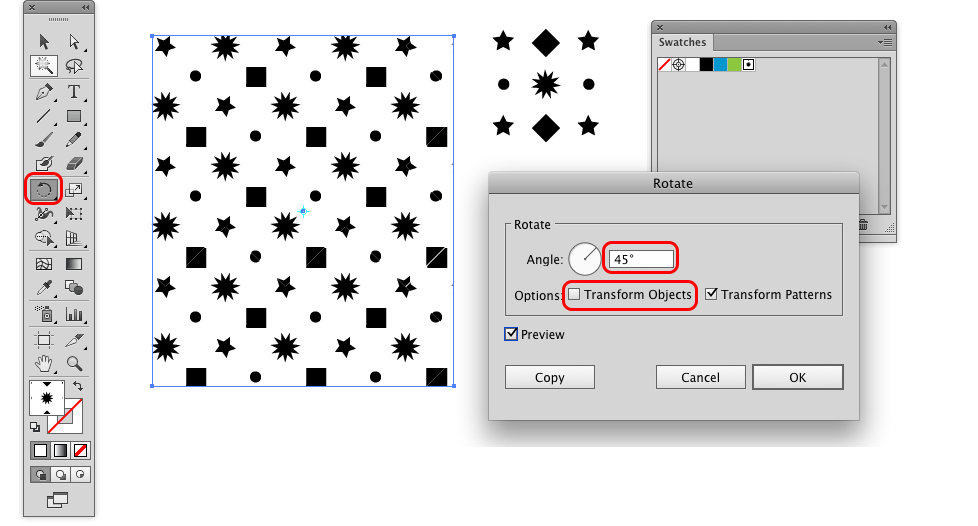
In order to rotate a pattern, do the following:
- Choose your object
- Double click on the rotation tool in tools panel. The rotation dialog box will appear.
- Choose the angle of the rotation ( in my case 45°)
- Uncheck Transform Objects.
- Press OK
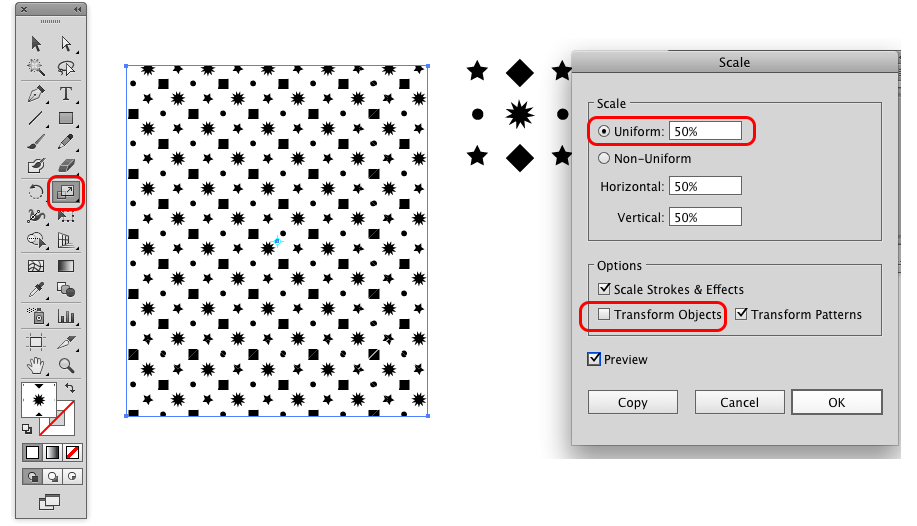
If you want to scale the pattern:
- Choose your object
- Double click on the scale tool in tools panel. The scale dialog box will appear.
- Choose scale percent at Uniform (if you want the proportional scale)
- Uncheck Transform Objects.
- Press OK
The created pattern has a transparent background. If you want to make a pattern with ground solid color there are two different ways to do it.
In the first case you can use an Appearance palette and add an extra fill to your object, as I described it in my previous blog post
The other way is to keep the rectangle with the fill that have been created to begin with. The simply make a copy-paste in back (see this blog post) and remove the fill from copied rectangle.
- Choose the rectangle with a fill
- Press “Ctrl/Cmd+C”
- Then press “Ctrl/Cmd+B”
- Remove fill from copied rectangle

- Then select all elements in your tile and track-drop it in the swatch panel
It is possible to update/overwrite patterns. Press Alt wile tracking you tile into Swatches panel. Move the mouse on the pattern swatch, you wish to update/overwrite and drop it, when highlighted. It is a bit difficult to coordinate.

At the end I just want to give some bonus information. Earlier in this post I introduced a shortcut “Enter” witch opens a Move dialog box. You can use it to move objects, group of objects, as well as single points. It can save you a lot time.