The MockUpinator script creates a die-cut line in seconds. It’s easy to use and provides some additional adjustable features, helping you work with packaging efficiently. Please read this post to learn how it works and start saving your time. Note that the created die-cut can only be used as a mock-up and not as a technically constructed die-cut, but even so, the MockUpinator script can significantly improve your workflow.
Installation:
- Place the script in:
Win (32 bit): C:\Program Files (x86)\Adobe\Adobe Illustrator [vers.]\Presets\en_GB\Scripts\
Win (64 bit): C:\Program Files\Adobe\Adobe Illustrator [vers.] (64 Bit)\Presets\en_GB\Scripts\
Mac OS: <hard drive>/Applications/Adobe Illustrator [vers.]/Presets.localized/en_GB/Scripts
2. Restart Illustrator
3. Choose File > Scripts > MockUpinator
To save time, you can also record an action. I covered that in my previous post here.
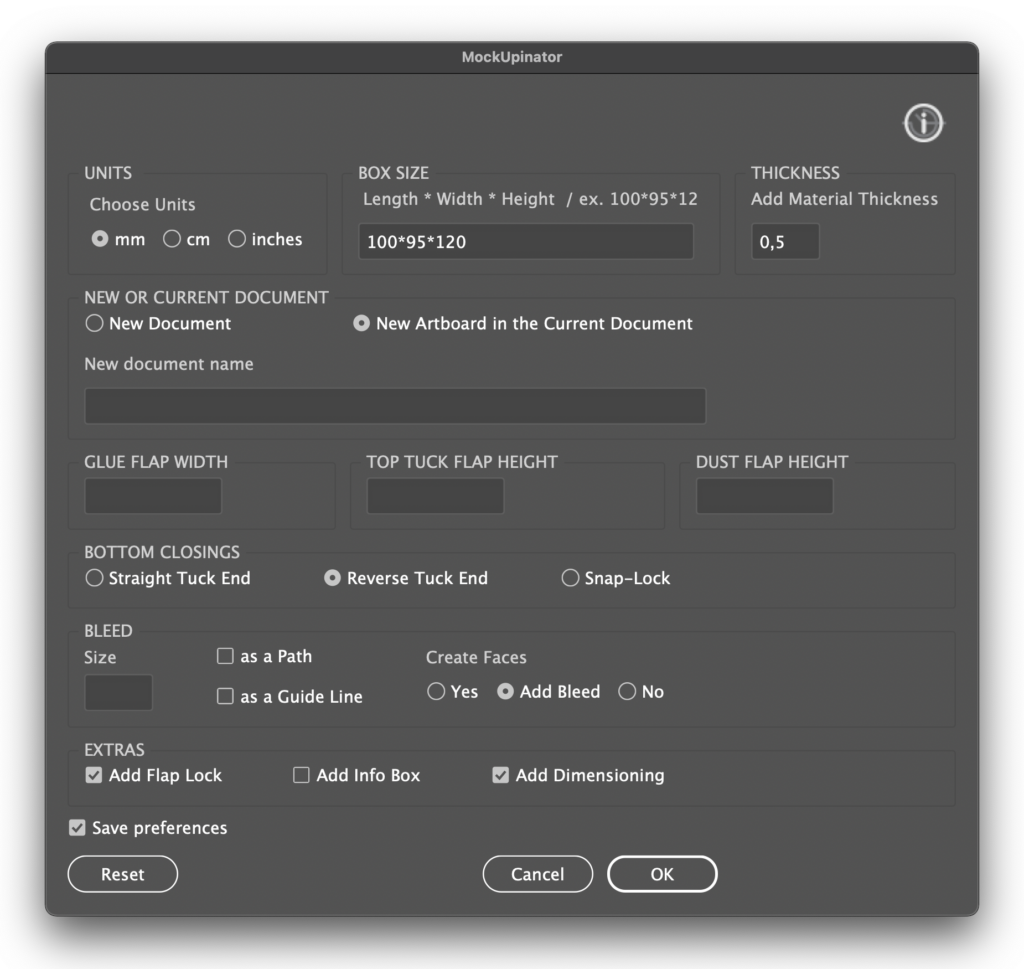
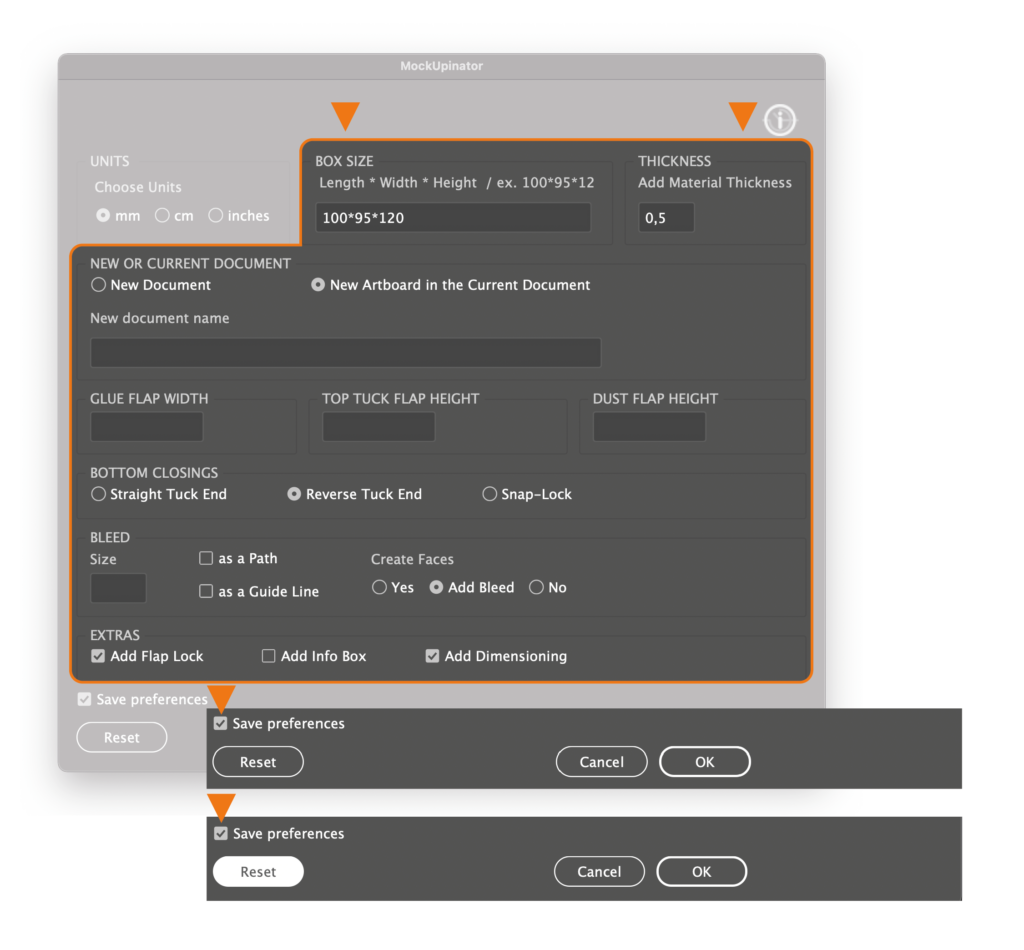
When you run the script, it opens a Dialog, as shown in the picture below.
UNITS
The script will choose the units from the current document. However, if units in the current document are in other measurements than millimetres, centimetres or inches, then millimetres will be used as a default. If you switch from mm to cm or inches and choose to open a new document, this document will be in these units.

THICKNESS
Here you can enter a thickness of a paper you use or leave it at 0 if you don’t need it.
BOX SIZE
When you enter the size of your box numbers, you can use “x”, “/” or “*” for separating the values. “/” and “*” signs are convenient as they are available from the numeric keyboard (as examples 100x85x 120 or 250/120/350 or 8.5*6.5*10). It must be in order: length of the box, then width and height.
NEW OR CURRENT DOCUMENT
By default, the New Document button will be activated. Moreover, when the “New Document” is selected, you can give it a name.
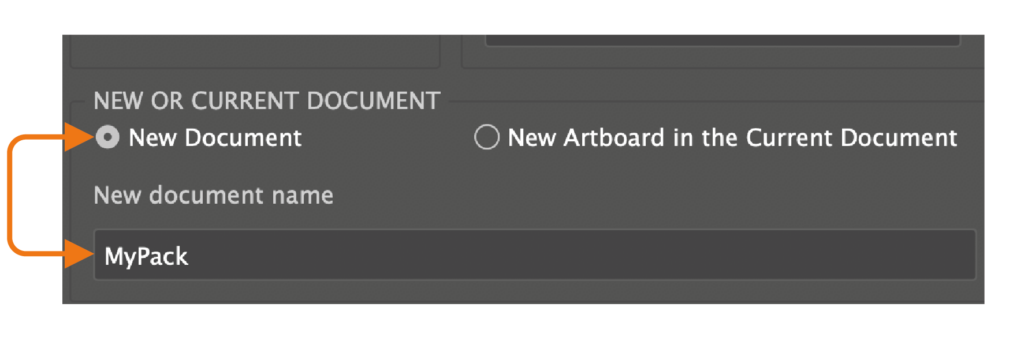
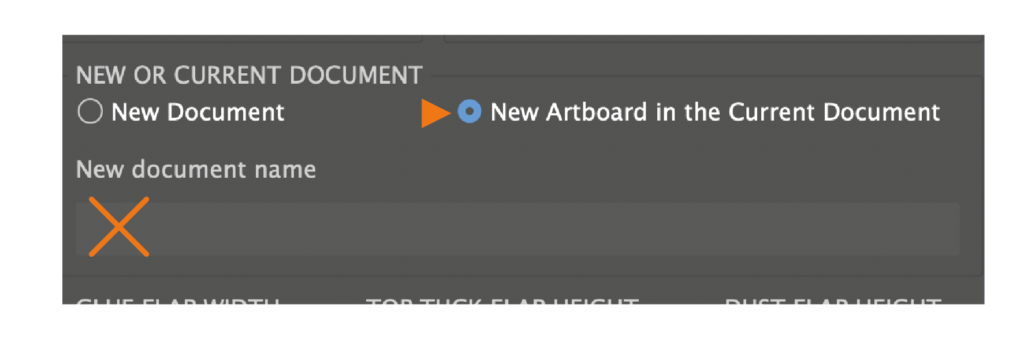
On the other hand, if you need to make multiple die cuts in one document, there is an option. If you choose “New Artboard in the Current Document”, it’ll create a new artboard in the current document. If you choose to do so, there are two things you must be aware of. First of all, you can’t rename the current document. Secondly, the script will crash if your artboard runs out of space in the Adobe Illustrator working area. But do not worry. In that case, the solution is to rearrange artboards and rerun the script.
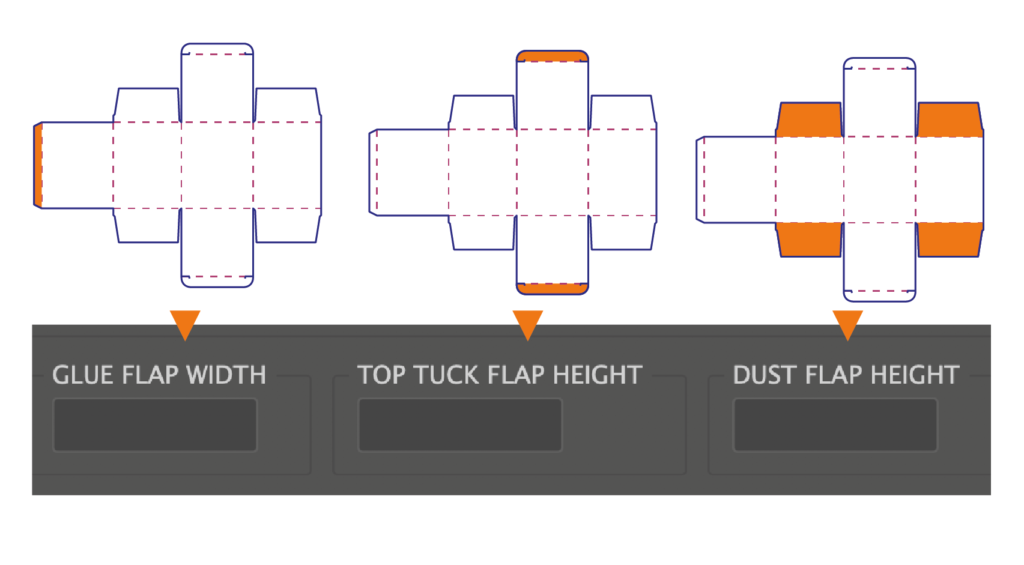
GLUE, TOP TUCK, AND DUST FLAPS
You can also adjust the width of the glue flap and the heights of the top tucks and dust flaps. If you leave these fields empty, the default values will be used.
The default size for the Glue flap is 1 cm and 1.5 cm for the tuck flap. The dust flaps height will be created automatically and depends on the size of your box. But for the dust flaps, there is an additional twist. There is a maximal value, which is a little longer than half of the entered length. If the entered value is higher than the max value, the max height will be created automatically.
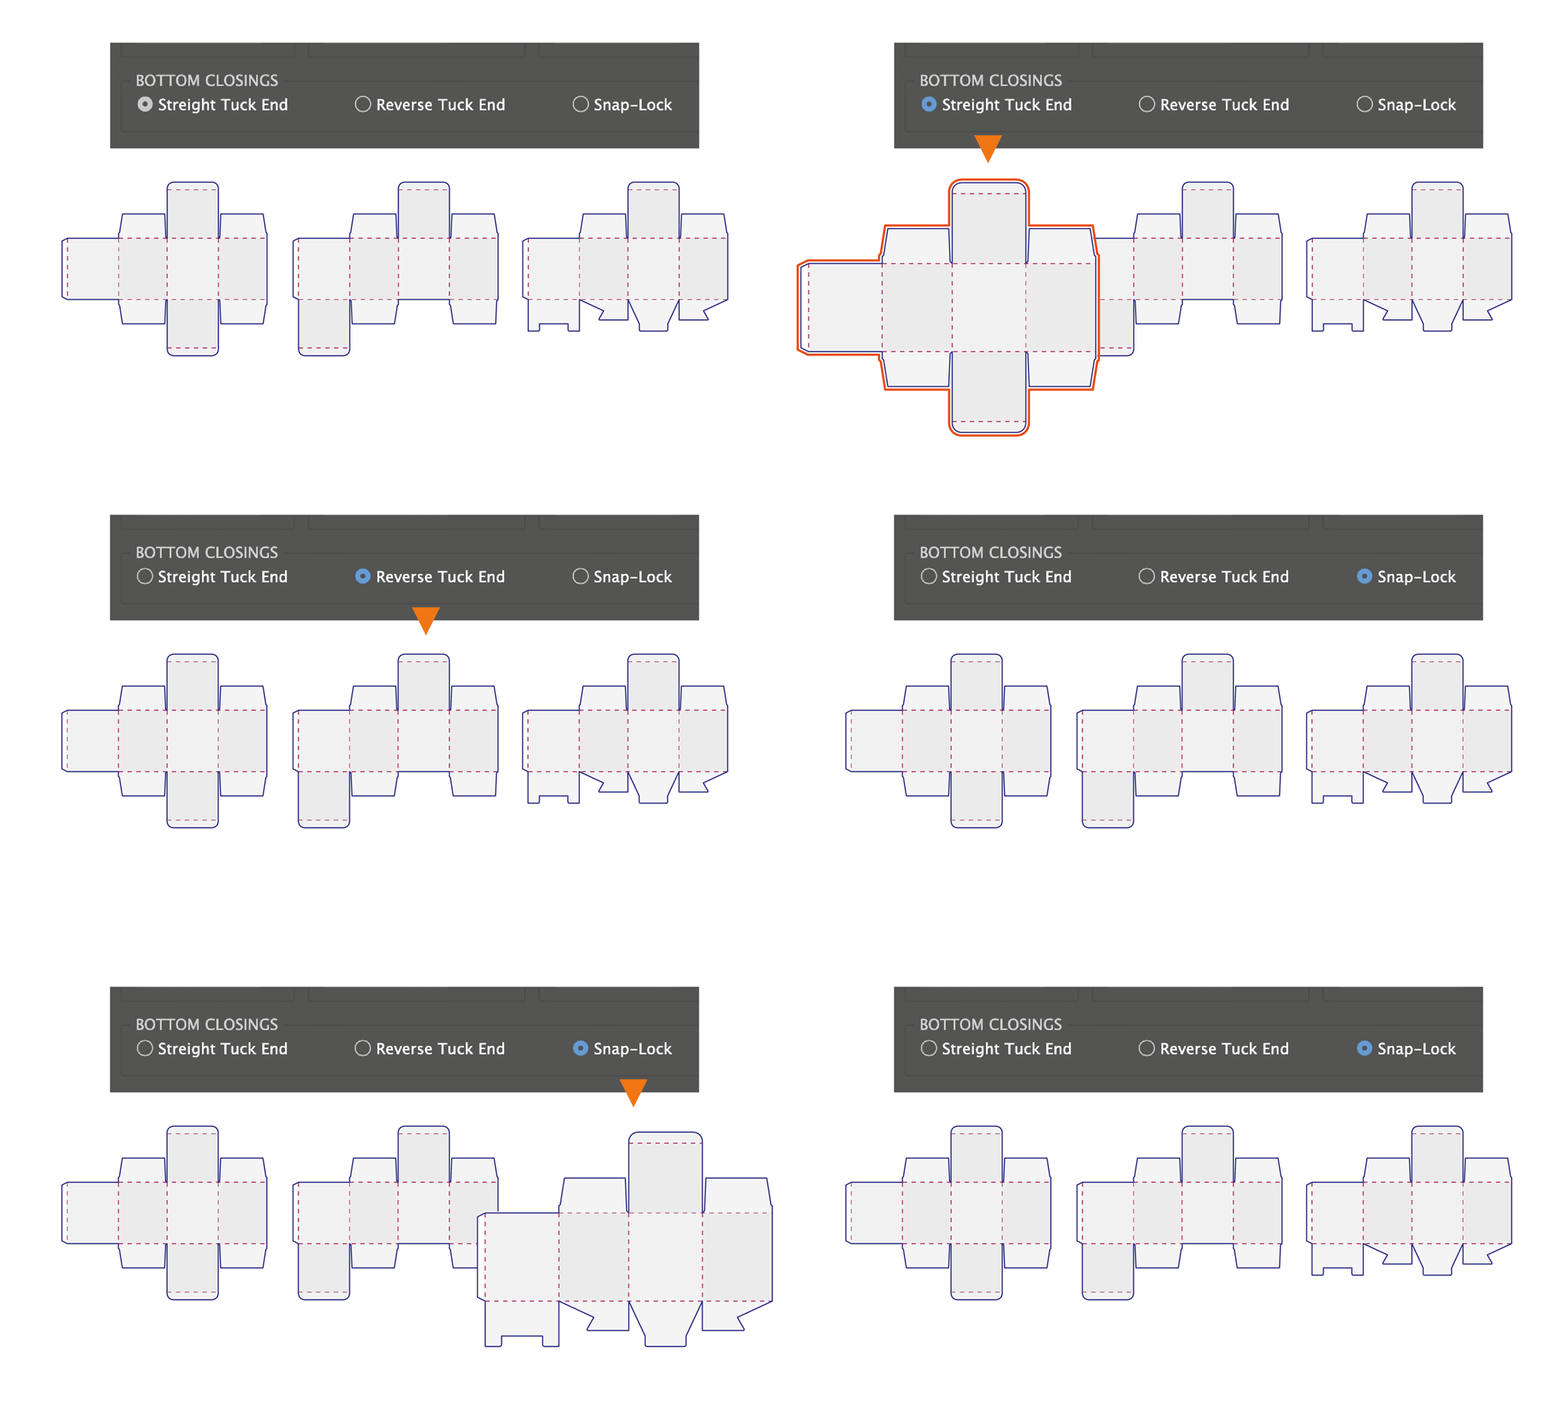
BOTTOM CLOSINGS
You can choose between three bottom closings: Streight Tuck End, Reverse Tuck End and Snap-Lock End.
BLEED
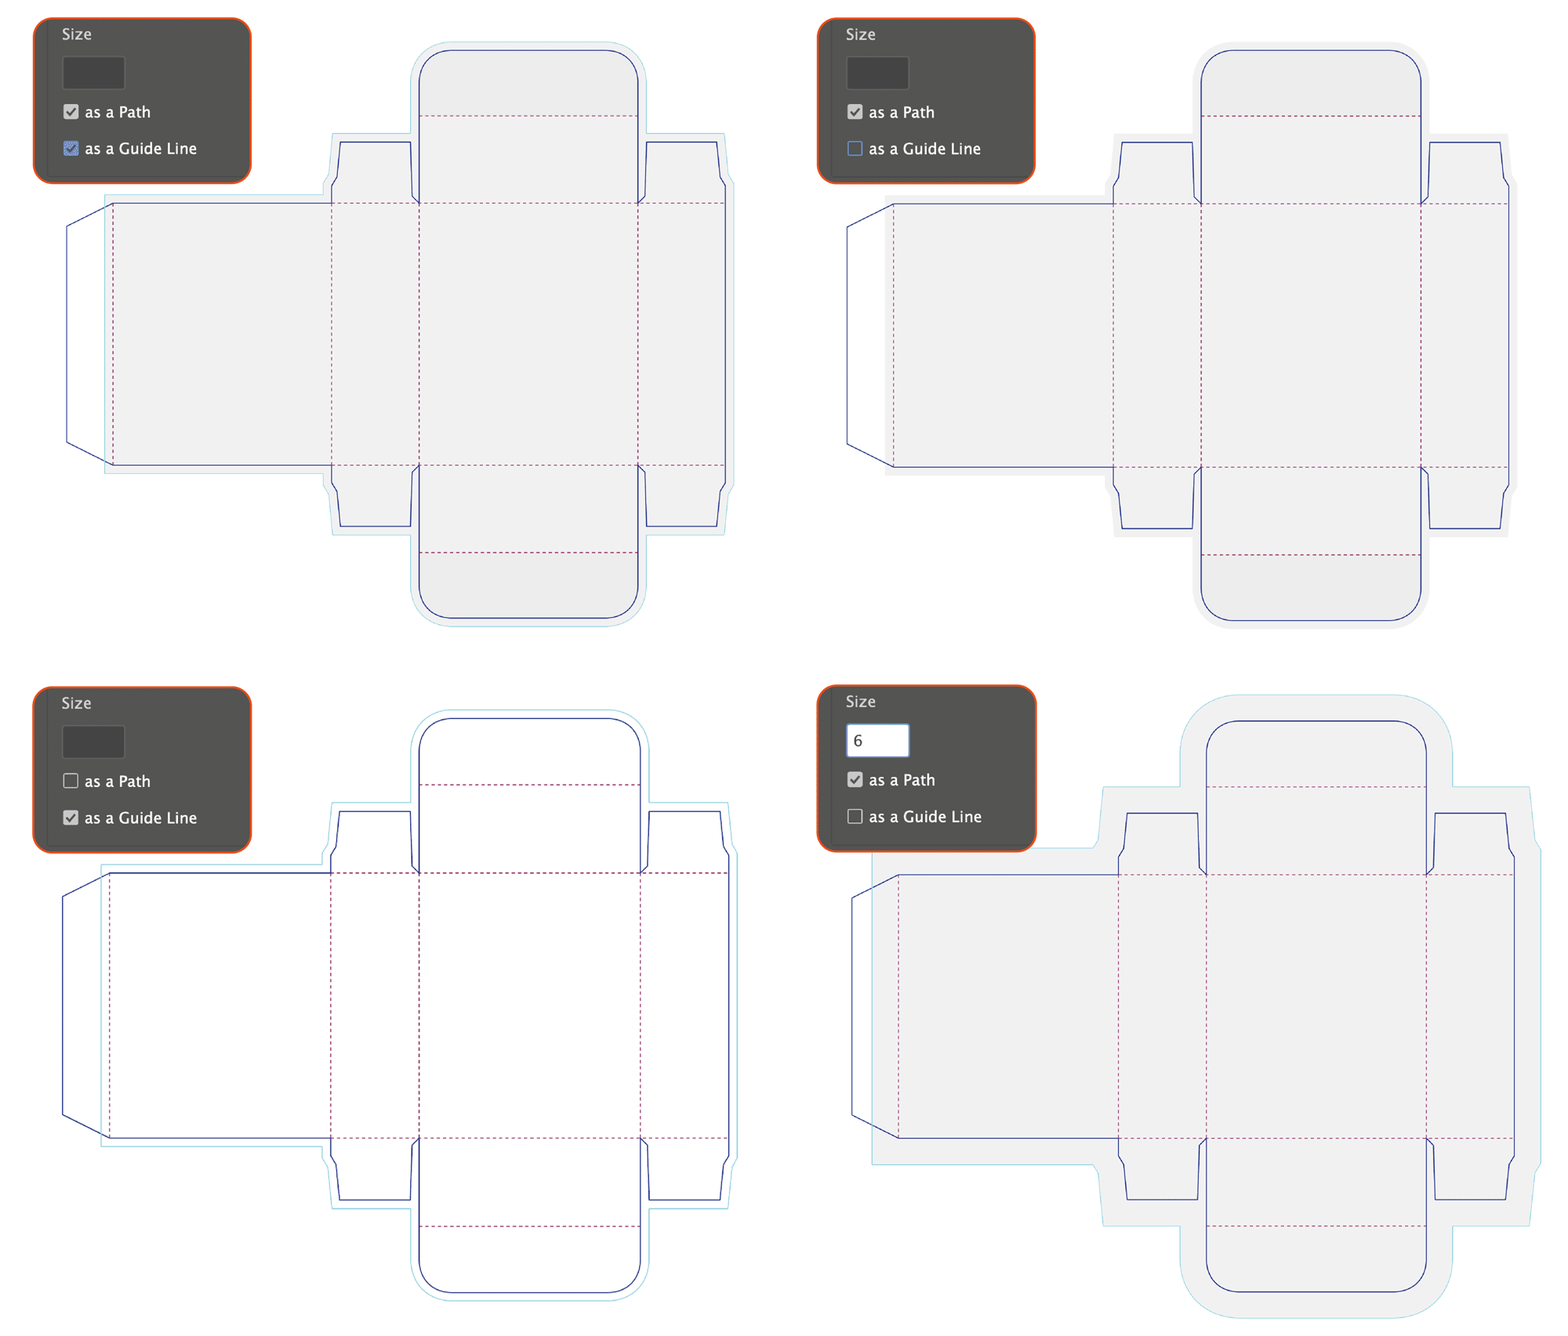
There is a possibility to add a bleed. The default size of the bleed is 2mm or 0.2 cm, but you can adjust the size of the bleed yourself. You can also choose to have it as a path, as guides or both.
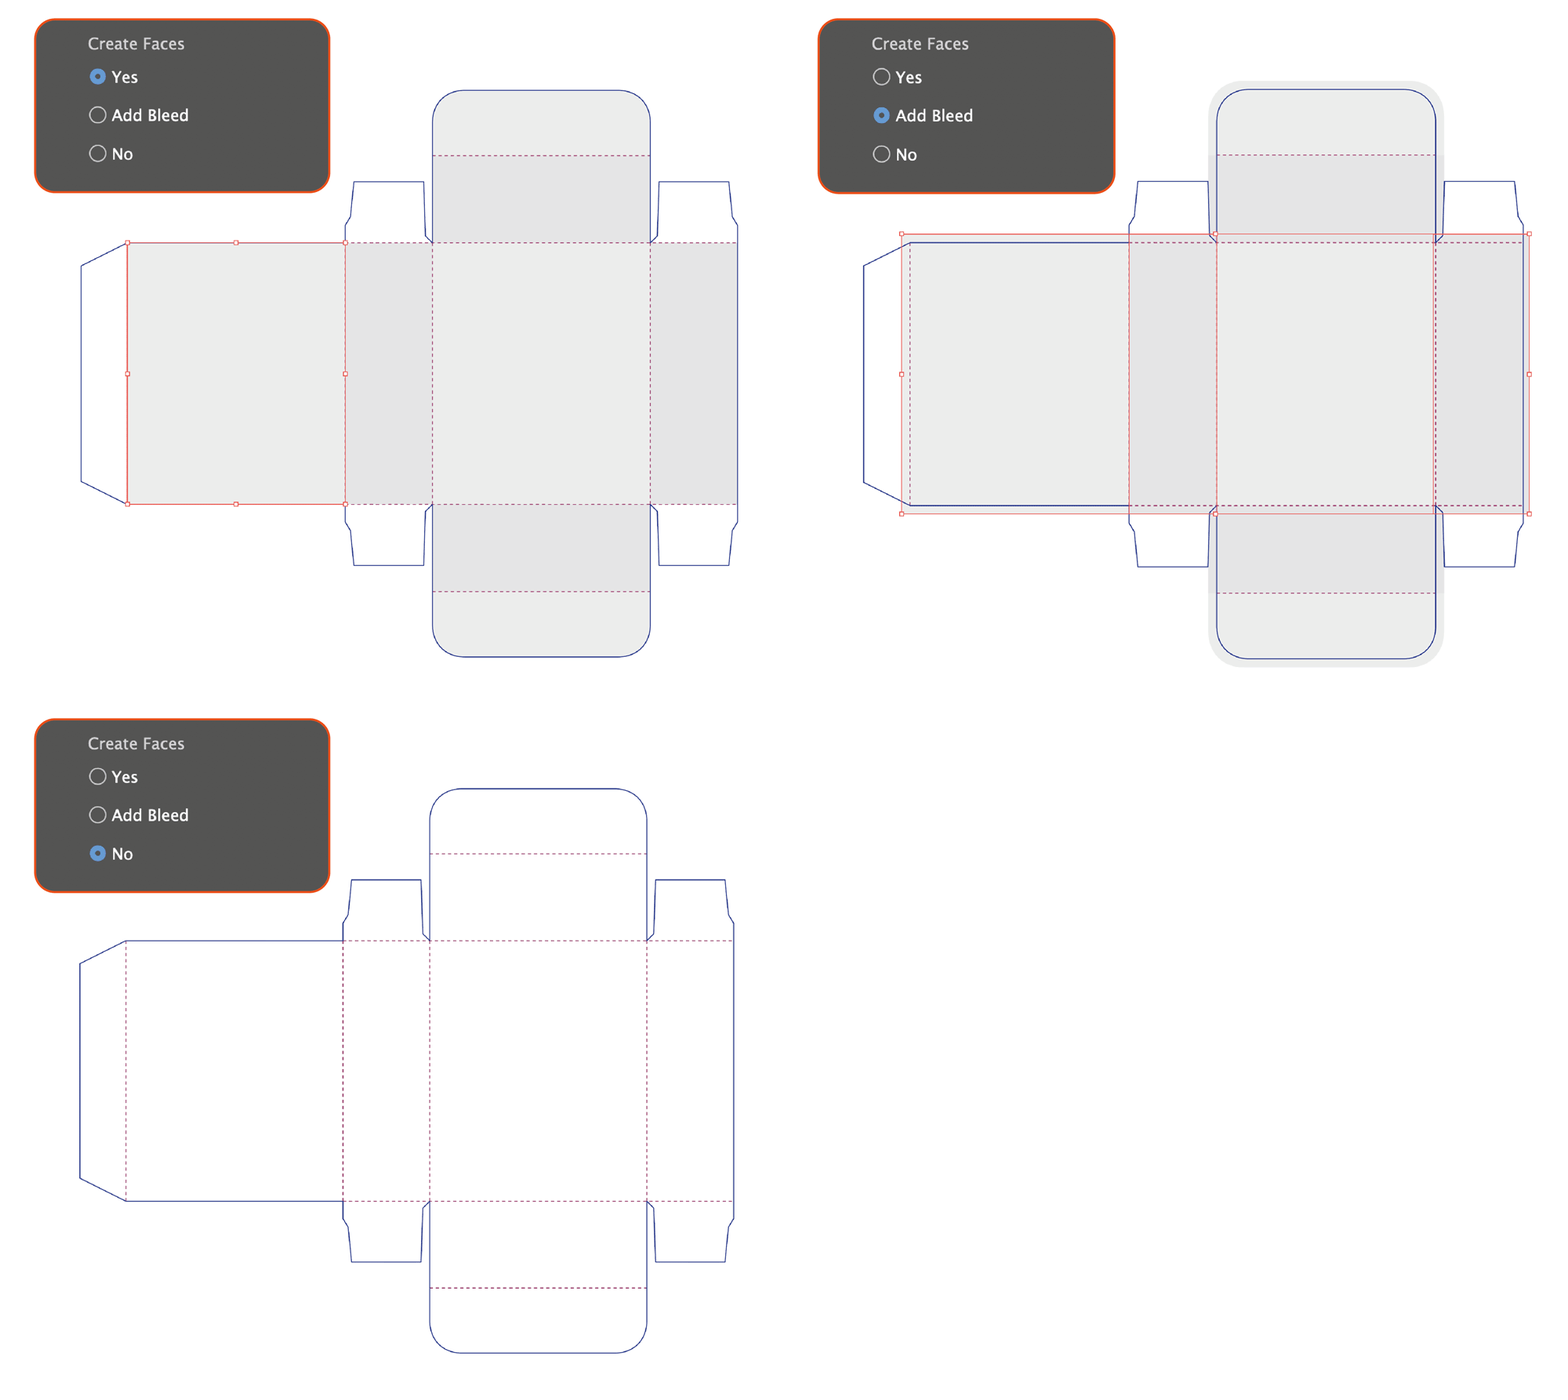
When I worked with packaging design, I often needed clipping masks faces for my work. Therefore, I added a function that creates faces. As the default, the script will always create faces that are aligned with cut lines, but you can also create faces, that follow bleed or just choose not to have faces at all. I made them slightly different solid grey for better visibility.
EXTRAS
Furthermore, I made some extra optional additions that, from my experience, can be very useful.
The first one is “Flap Locks”. You’ll add flap locks to your top and bottom flaps by setting a checkmark in Add Flap Lock. They are not adjustable and are always created with a default size, which depends on the size of your box. So be a bit careful, because sometimes they can be too large compared to the top tuck flap. The solution can be to adjust the height of the top tuck flap.
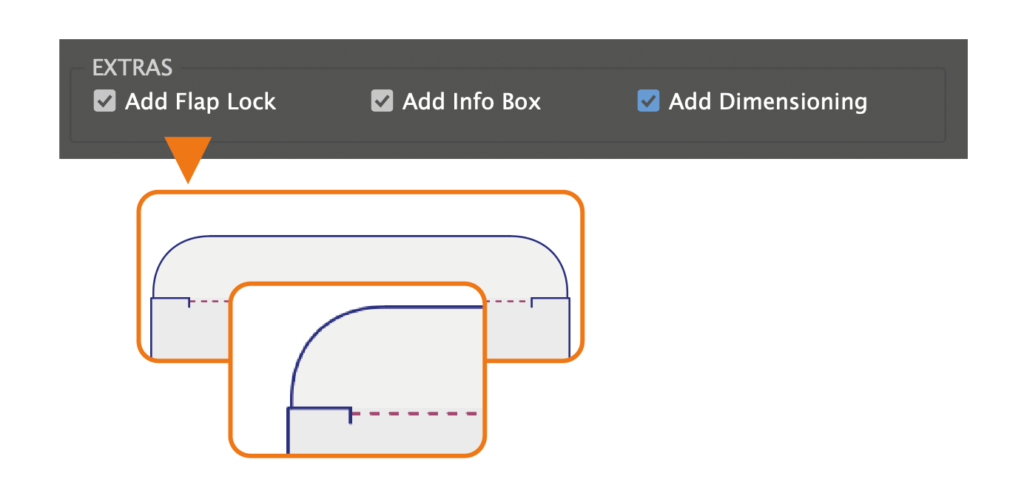
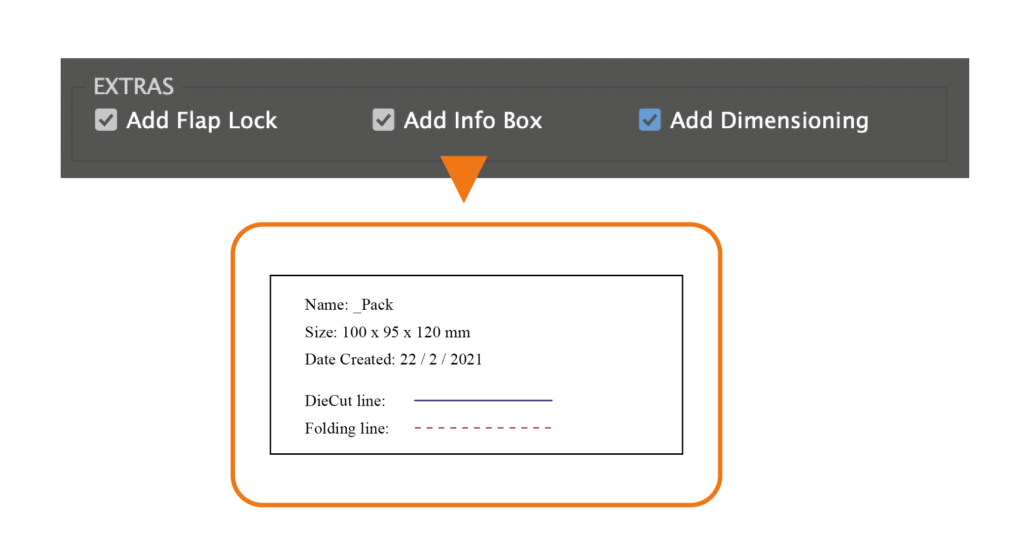
Moreover, you can add a small Infobox, where the name, the size of your box and the date created are displayed.
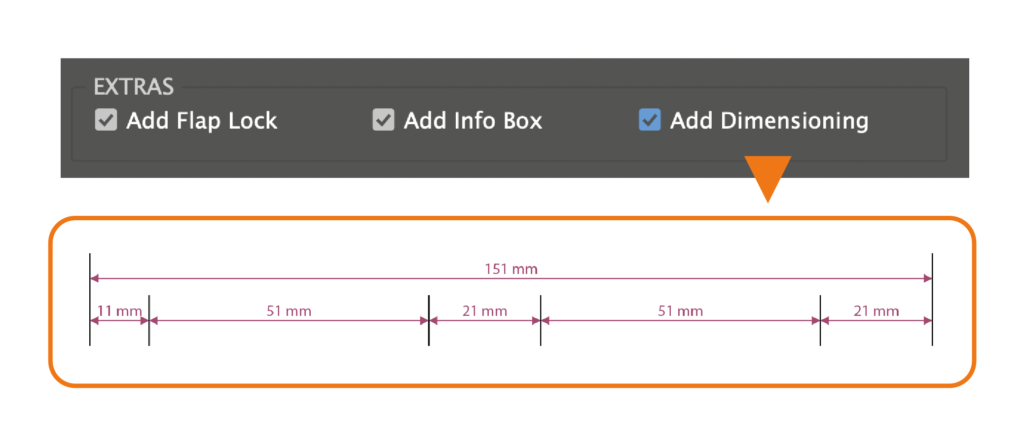
It is also possible to create dimensioning lines.
PREFERENCES
For a smoother workflow, I decided to add the ability to save preferences and reset them to the default. All parameters you can see in the picture below inside the orange window can be customized after your needs and saved as preferences.
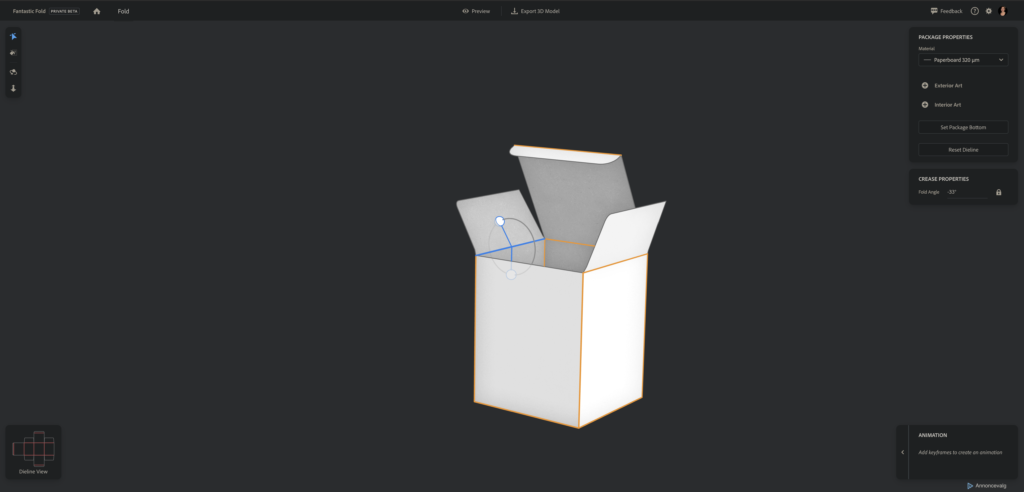
As a last comment, I will inform you that the die-cut created with the Mockapinator script can work with the Adobe FantasticFold application. The FantasticFold application makes it easier to visualize your packaging as a 3D model.
Creating a die-cut with the MockUpinator script can save you a lot of time, and I hope you’ll be much more productive by using it.
The MockUpinator script is available here. As it was a tremendous effort to write it, I charge a small fee, but there is also a freemium version that you are very welcome to download and use. I hope you find this fee reasonable and affordable for most of you.




24 Responses
Later can increase the box?
Thanks for the comment. I’m not sure what you mean. Do you mean to expand the selection of box types? In this case, the answer is yes. I would like to have more types of boxes and I would love to hear which type you think could be your priority?
Hello Katja:
thank you very much for your Mockupinator. A few days ago I buy you Mockupinator and works fine, so will be incredible if the thickness of the material could be adjusted. Depending on the thickness of the cardboard, the packaging should be readjusted.
Thanks again!
Hi Xema
Thank you very much for your comment. I´m so happy, that you like my Mockapinator script. I´ll think about how I can add this feature and improve the future functionality of the script.
Hi Katja:
I hope you implement the improvement. It will become a perfect plugin! Please let me know by email packaging@alverlamp.es
Many thanks.
Yes, I’ll let you know. We are working on it right now.
Great works but need to add more box type specially Crash Lock Bottom
Thank you for your comment. I’m improving the script, among other things, adding this type of box cut and thickness of the material.
BOTTOM CLOSINGS
You can choose between three bottom closings: Streight Tuck End, Reverse Tuck End and Snap-Lock End.
Please add bottom closings: Crash-Lock Automatic, Edge Lock, Seal End
Thank you for your request. I’m trying to find a time to do it.
Any update for addition of bottom closings: Crash-Lock Automatic, Edge Lock, Seal End please do the needful awaiting for purchasing the MockUpinator script.
Also needs an update in MockUpinator script
The Safe Zone Line
The safe zone lines are usually marked using dotted lines and are offset inwards from the trim lines. They mark the areas that will contain important printed content, such as branding, product name and any other readable information.
Please add bottom closings: Crash-Lock Automatic, Edge Lock, Seal End
Awaiting for the needful update in the MockUpinator script
Thanks in advance
Dear Katja
Your time is much precious time for us.
In Mockupinator please add bottom closings:
1) Crash-Lock Automatic.
Hi Katja:
Is there any scripts for RSC, IRSC, HSC Corrugated carton box creation?
Hi, MJ, and thank you for your comment. Unfortunately, I don’t know any script for these types of boxes for Illustrator. However, some online resources can do the job.
Can you add crash lock bottom?
Thank you for your request, Raja
I’m in the process of calculating a bottom closing for this type.
What is the exact difference between the free and paid version?
I see it, its the different models. This is pretty nice. Did know about this app from adobe neither. Took me a while to figure out i need to use the export for screen function to get proper svg. Man this saves so much time. I did this a couple times using blender. But making a 3d model of a die cut is such a hustle. This new app makes it super fast.
PS do you use scriptui from Joonas to design your panels? If not, you need to check this out, its so easy to design panels. Finding this has saved me hours and hours of testing panel design. I used to do it by hand and reload the script with each edit
https://scriptui.joonas.me/
Yes, it’s funny, I used to use Blender for 3D models too, but this application is much more convenient. Yes, I use scriptUI for my dialogues and sometimes modify them myself later in the process.
Thank you very much! Very very cool script
Hi Katja,
I congratulate you for this really great script.
I wanted to ask you and some expert packaging users something (I see that there are some).
Apart from this script (which does everything automatically and immediately, fantastic!!!), I wanted to understand, and I ask you that surely you will have had to study the subject in order to then be able to create software, if there is a design theory to be able to define the various parts of the box, e.g. the flap lock, snap-locks, dust flap, tuck flap, glue flap are designed in that specific way or not.
What are the standard measures, the displacements of the layout in the return of the closing flaps, the paper thicknesses, etc.
I’d be interested in studying these things (before switching to a software that does it for me), but I wouldn’t know where to start.
Can you help me?
Hello Nicky! Thank you for your interest. I appreciate your curiosity and willingness to learn more about packaging design theory.
I myself have struggled to find a comprehensive resource on the subject, but I have been able to gather only some information by analyzing existing packages and software and speaking with people who work in the field of box building.
From what I can see, there are some standard measures and paper thicknesses that are commonly used in the industry. These can vary depending on the specific application and intended use of the box. As for the layout and displacement of the closing flaps, there are no hard and fast rules, but designers often take into account factors such as ease of assembly and structural stability.
Personally, I would like to find the right person or a group of persons who understands the technical part of the construction of boxes and who could help me improve this program. If you’ll in your research will find some interesting and useful information, I’ll be really happy to know.
Thank you again for your interest, and I wish you the best of luck in your research!