Overview of the Improved ColorList Script
Introducing the improved ColorList Script, a tool I developed to streamline the color management process in Adobe Illustrator. I wanted to create a tool that gives designers an easy, time-saving way to beautify their artwork. I believe styling color charts can be the finishing touch to your presentation or style guide.
How Does the Improved ColorList Script Work
In short, the script copies your selection, creates a Swatch Group from the colors you used in the selection, and displays the list of colors on the artboard. At the end of the process, the ColorList script will remove the swatch group and selection copy. This feature is handy when you work with various style guides or need to make a color chart from some artwork.
Download and Installation
To begin with, download the improved version of the ColorList Script here where it’s listed together with other of my freeware scripts.
Installation of the Improved ColorList Script in Adobe Illustrator
Then, install the ColorList Script, following these steps:
Download the ZIP Folder
- Download the ZIP folder containing the ColorList Script.
Extract the JSX File
- Extract the
ColorList.jsxfile from the ZIP folder.
- Extract the
Place the JSX File in the Scripts Folder
- Windows (64-bit):
C:\Program File\Adobe\Adobe Illustrator [version] (64 Bit)\Presets\en_GB[US/ Language]\Scripts\ - Mac OS:
/Applications/Adobe Illustrator [version]/Presets.localized/en_GB[US/ Language]/Scripts
- Windows (64-bit):
Restart Illustrator
- Restart Adobe Illustrator to apply the changes.
Access the Script
- The script should now be visible under
File > Scripts > ColorList.
- The script should now be visible under
Additionally, you can search the web for more information on installing scripts in Illustrator. For example, Mike Rankin’s article in Creative Pro is very illustrative and instructive.
Improved ColorList Script: Default and Custom Modes
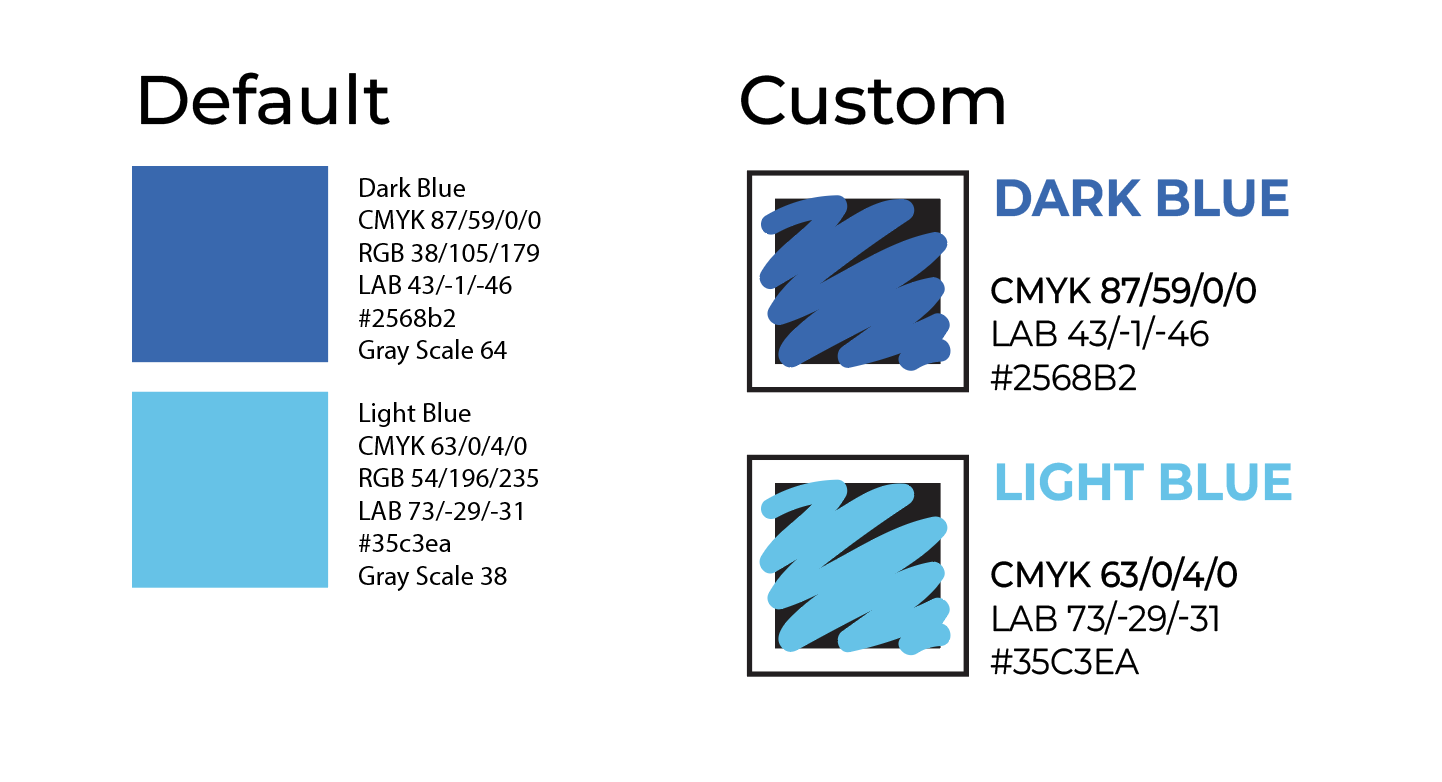
Default Mode: Run the script, and colors from your selection will appear in a predefined format that I’ve crafted carefully. The script displays color values in CMYK, RGB, LAB, HEX, Gray Scale, and shows the swatch name. This mode is perfect for quick and effortless color listing.
Custom Mode: This mode is undoubtedly for those who prefer a personal style. It allows you to personalize the appearance of your color sample. Specifically, you can customize the look and choose which color values to display, ensuring your color references match your brand’s style guides perfectly.
Let’s dive into improved ColorList’s new features, learn how to set it up, and explore its bright and dark sides.
Default Mode
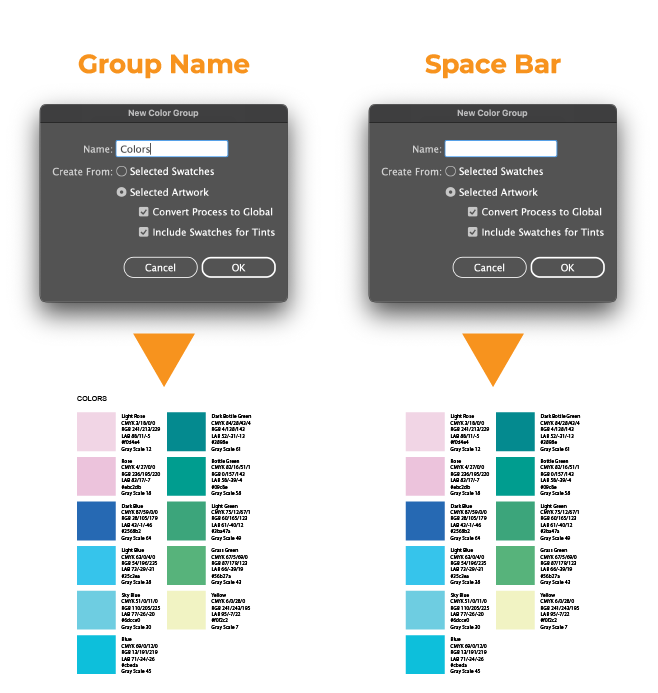
To activate Default Mode, first make a selection and start the improved ColorList script. When the ‘New Color Group’ dialog opens, you can either name your group or type a spacebar. You must type something to activate the OK button.
Color Group Name
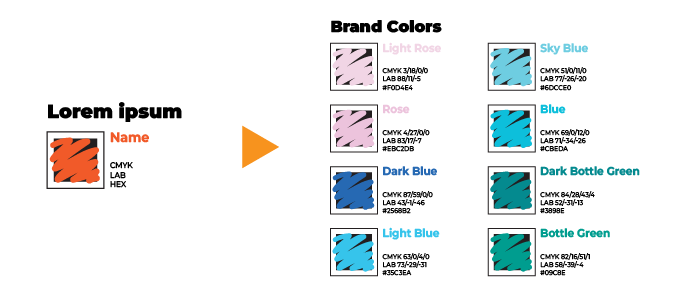
If you type a name, the script will display the color group name. Alternatively, if you type a spacebar, the Color References will appear without the group name. In either case, you will end up with a Brand Colors Chart organized in six rows, as shown in the image below.
What is #Digit
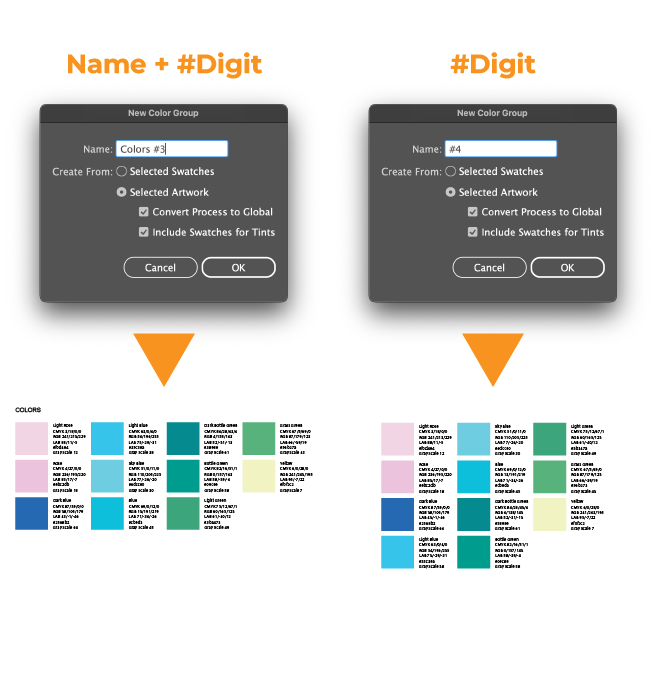
Even in Default Mode, you have the option to make some adjustments. For instance, whenever you type #Digit, the script organizes the Color Palette into the number of rows corresponding to the digit you typed. Therefore, as illustrated in the image below, typing #3 results in a Color Chart with three rows, and typing #4 results in a Color Guide with four rows.
Appearance of the Default Swatch Sample
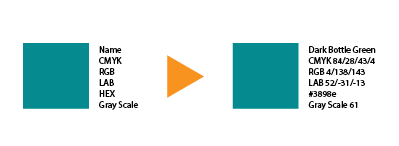
In Default Mode, you will see all color values displayed, starting with the Swatch Name, followed by CMYK, RGB, LAB, HEX, and Gray Scale. The swatch sample-path takes the form of a basic rectangle, and the entire output will look like the image below.
The Color Guide Group will be placed slightly below your selection. Since the script groups the entire Color Reference Guide, you can easily move it to another location.
If this setup works for you, then you can stop here. However, if you want to customize the shape, change which values you display, style the text, and choose the start location of your Color List, then continue to the next section.
Custom Mode: Style Color Samples
Unlike Default Mode, Custom Mode gives you more freedom to style the color sample, allowing your Color References to match the style of your artwork or brand.
Placement of the Color Group
With Custom Mode, you also have better control over where the Color Chart will appear: it starts from the upper left corner of your Sample group. What about row control? Yes, the #Digit feature also works here.
You create the custom-modified Color Gide list by following these instructions:
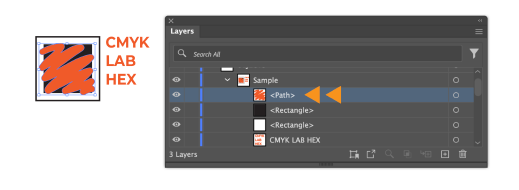
Create a Sample Group: First, create a group containing a path and text. Name this group “Sample”.
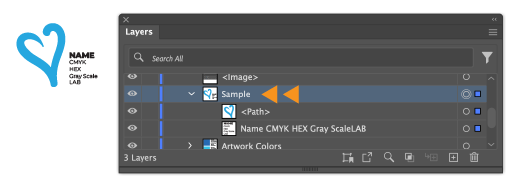
Text Requirements To display specific color values, use the following labels:
- Name: Displays the swatch name.
- CMYK: Displays CMYK colors.
- RGB: Displays RGB colors.
- HEX: Displays HEX values.
- LAB: Displays LAB colors.
- Gray Scale: Displays Gray Scale values.
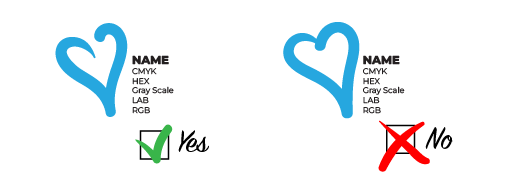
It is important to realize that you can apply styles to the text, change the order of the values, and remove some values from the list. Additionally, you can use more than one text frame for each value you want to display. In fact, you can remove the text if it suits the purpose of your layout. The image below shows an example of the output.

You can also see that one of the paths has a thin gray stroke. This is done for visibility when the color is lighter and the contrast with a white background weakens.
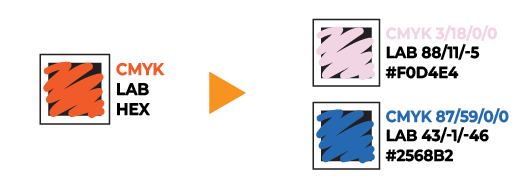
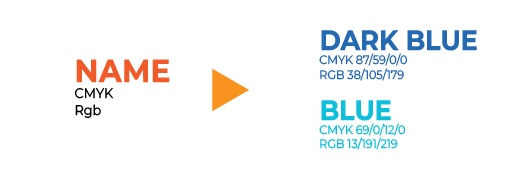
Text and Path Color Matching
If the path and some text have the same color, the text will be colored in the swatch color. However, if the swatch color is too light, the text will be dark gray. You can see this in the image below.
Enhanced Appearance
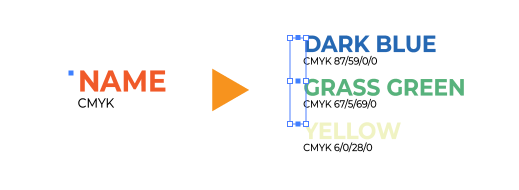
To make your Color Sample appearance more interesting, you can add more than one path to the “Sample” group. Be aware that only the path at the top of the stack will be colored in the swatch color.
In a similar fashion, as you can remove the text in the ‘Sample’ group, you can also remove the path. In this case, the text will be colored in the swatch colors, as shown in the image below.
If you want only some text to be colored in the swatch color while other text remains unchanged, use this trick:
- In the ‘Sample’ group, draw a line.
- Color it with a fill color that matches the part of the text you want to be recolored in the swatch color.
- Remove all the points except one.
The result is shown in the image below. As you can see, there is a tiny little dot in the sample and in the color chart as well.
Group Name
Of course, you also have the option to add a name to your Color Guide Group. To do this, follow these steps:
- Add a text frame and name it “Colors” in the Layers panel.
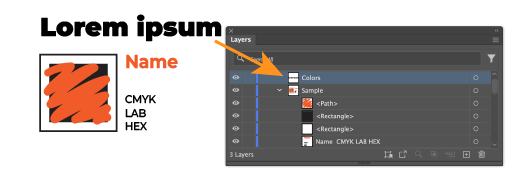
- After you run the script, the text will change to the name you entered in the ‘New Color Group’ dialog.
Improved ColorList Script: Issues
While the improved ColorList Script offers many benefits, there are a few issues you should be aware of.
Cancel Button
The first thing to note is that even if you press the ‘Cancel’ button in the ‘New Color Group’ dialog, the script will still run. In this case, the ColorList script will either take the last Color Group in your Swatch Panel or throw an error if you don’t have any Swatch Group. I haven’t had the time to address this issue, so if anyone knows exactly how to solve it, I would greatly appreciate your help. You can press Control (Ctrl) / Command (⌘) + Z to revert the action.
Do not use the Improved ColorList Script with Actions
I’m a big fan of starting scripts with one click using different tools. One of these tools, which is easy to use for designers, is Actions. You can read about scripts in Actions in my very old post, which is still relevant. Unfortunately, the improved ColorList script is impossible to use with Actions.
Wrapping Up
Achieving the Vision
With all the improvements to the ColorList script, I managed to achieve my vision of a tool that streamlines the color management process in Adobe Illustrator. Whether you use the Default or Custom mode, this script can save you time and enhance the visual appeal of your presentations and style guides.
Default Mode Benefits
In Default Mode, you get a quick and effortless way to list your colors in a neutral format.
Custom Mode Benefits
Custom Mode, on the other hand, offers you the freedom to personalize the appearance of your color swatches, allowing you to match your brand’s style perfectly.
Addressing Drawbacks
While the script has a few drawbacks, such as the Cancel button issue and incompatibility with Actions, the benefits far outweigh these minor inconveniences.
Final Thoughts
I hope you find the ColorList Script as helpful as I do. Download it today to improve your color management in Adobe Illustrator. Start using it now and see how it can enhance your workflow and presentations. Share your thoughts and any workarounds you discover in the comments below!


2 Responses
This script is honestly brilliant!! I did just notice that while the RGB, CMYK, and LAB values are all correct – the hex is slightly off for all. Is this a universal bug or something in my settings that would cause this issue?
Also out of curiosity, is it possible to add other colour codes like HSL or HSB? You’ve opened my adobe scripts world and now the possibilities feel endless! Thanks 😀
Hi Melanie, and thank you for your kind words and for bringing this issue to my attention! I’ve reviewed the script and corrected the hex color value calculation. I’ve updated the script, and I would appreciate it if you could test the new version and let me know if it resolves the issue on your end.
Regarding HSL and HSB color codes, I’m happy to look into adding them when I have the time. I’m glad to hear the script has sparked your interest in Adobe scripting—there are indeed many possibilities!